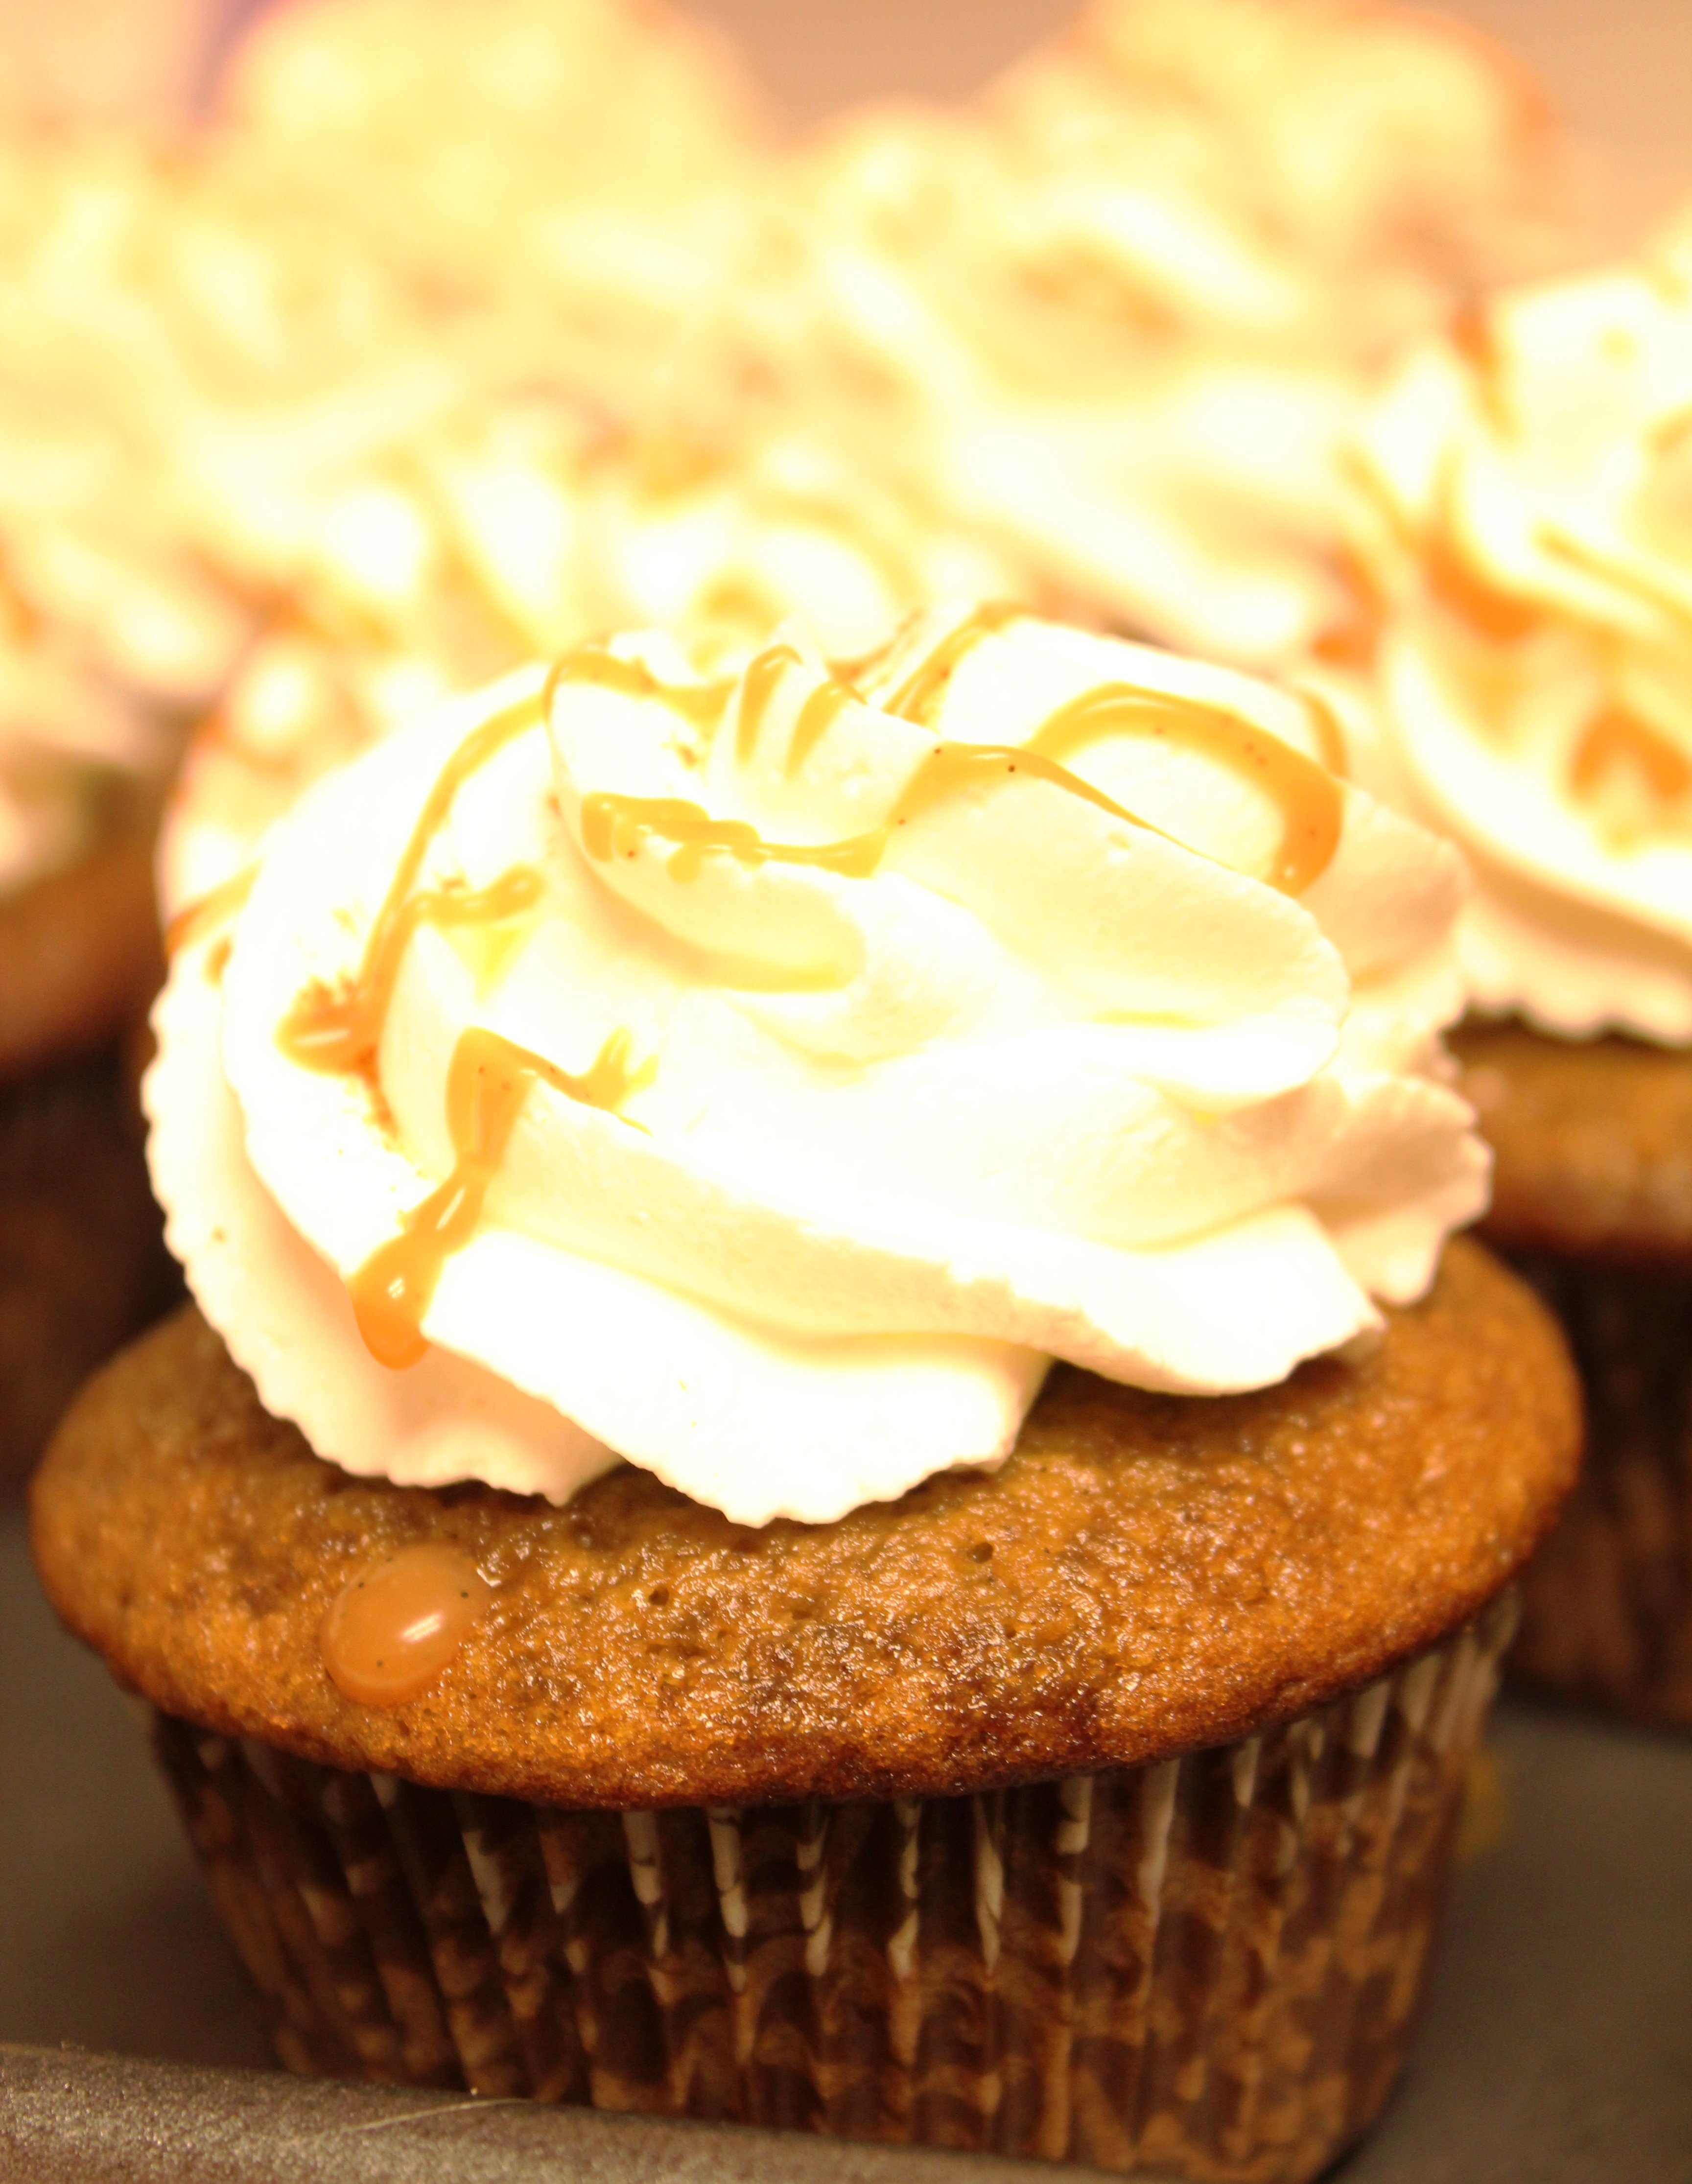
Pumpkin Spice Latte Cupcakes


Every year when September 1st rolls around I know our Starbucks budget is going to go through the roof. My husband and I are huge fans of their Pumpkin Spice Latte. And when I saw these cupcakes I was intrigued, they looked very good. Then when asking my office mate what kind of cupcake she wanted for her birthday I threw this one into the mix. She is also a big fan of the latte at Starbucks, so it seemed the perfect match.

These cupcakes are very good, they are very moist due to the pumpkin and the additional coffee added. I feel they are a little more muffin-like than a traditional cupcake but spice cake is often that way, even so they were pretty light and not too sweet. The whip cream topping is also barely sweet, so if you like your whip cream on the sweeter side I would test that as you make it. I know the traditional PSL’s at Starbucks do not have a drizzle of caramel sauce but I think it finishes the cupcakes nicely so I included it. Overall these were a big hit, my coworker loved them and everyone else who tried them did as well.  Some could really taste the coffee flavor and some couldn’t, for me it was there just enough but not overpowering. If you are looking for something a little different and not too sweet these are a lot of fun.

Pumpkin Spice Latte Cupcakes:

From: Annie’s Eats

Makes just over 2 dozen cupcakes

Ingredients:
For the cupcakes:
2 2/3 cups all-purpose flour
3 tbsp. espresso powder
2 tsp. baking soda
2 tsp. baking powder
1 tsp. ground cinnamon
1/8 tsp. grated nutmeg
1/8 tsp. ground allspice                                                                                                               

1 tsp. salt
1 (15 oz.) can pumpkin puree *( I used homemade)
1 cup sugar
1 cup brown sugar
1 cup canola or vegetable oil
4 large eggs
½ cup coffee or espresso, for brushing

For the whipped cream:
2¼ cups heavy cream, chilled
¼ cup confectioners’ sugar (add more if you like your whip cream sweeter)

For garnish:
Ground cinnamon ( I used Pumpkin Pie spice)
Caramel sauce

 Directions: Preheat your oven to 350 F. Line your cupcake pans with paper liners. Combine flour, espresso powder, baking soda, baking powder, cinnamon, allspice and salt in a medium bowl. Whisk to combine and set aside. In your electric mixer’s bowl, blend together the pumpkin, granulated sugar, brown sugar and oil. Add the eggs one at a time and beat well after each addition. With the mixer on low-speed add the flour mixture in two additions, mixing until just incorporated.

 Fill the cupcake liners ¾ full. Bake until the cupcakes are golden and a toothpick come out clean, about 18-20 minutes. After about 10 minutes remove the cupcakes from the pan and place on a wire rack, brush with the coffee or espresso several times to get it really soaked in. Then let them cool completely.

  To make the whip cream, place your mixer bowl in the fridge for 10 minutes. Then with the Wisk attachment, whip the cream on medium-low speed to start and gradually increase to high-speed. Sprinkle in the confectioners’ sugar gradually. Whip to stiff peaks.

  Assembly: Put the whip cream carefully into a pastry bag fitted with a large star tip and frost the cupcakes. Sprinkle with the pumpkin pie spice and drizzle with caramel sauce. These will need to be stored in the refrigerator because of the whip cream.

 *Pumpkin Puree:

 To make your own pumpkin puree (and yes its worth it) you want to buy the small “Sugar” or “Pumpkin Pie” pumpkins. You cut off their tops and then cut in half and remove the seeds. You then place them on a baking sheet and bake them for 45 minutes at 350 F. Once they have cooled, peel off the skin and cut into chunks. Then place them in your food processor and puree. I found I needed to add quite a bit of water but that will depend on your pumpkins, just be sure to add a tablespoon at a time until you get the consistency you want.  You can use it immediately; store it in the fridge or the freezer. For more information and pictures check out the Pioneer woman’s site.
Sour Apple Martini

Ever since our first trip to the Cheesecake Factory a very long time ago, the apple Martini has been one of our favorite drinks. You can find a million different ways to make them on the web but until we made this one from my favorite bar book we didn’t have a go-to recipe. This martini, as with almost of the recipes in the book, uses fresh lemon-lime juice and adds the twist of mint. The mint is really a background flavor so if mint is not your favorite know its not overpowering, in fact the tart apple flavor of the apple vodka will surprise you. It really carries this drink very well and you will be happy you have a sugared rim to counter that tartness. This is a very simple drink to make and considering the apple vodka is the only alcohol in it and because its rather inexpensive in itself, this drink really is cheap to make. So if you love apple martinis or just need a new fresh drink to try, this one might become your new favorite!

Recipe from the book: Hip Sips
5 to 7 Mint leaves
2 ounces Smirnoff apple vodka (not apple schnapps)
1 ounce Fresh Lemon-Lime juice ( equal parts lemon and lime juice)
1 ounce Simple Syrup
Lollipop Rim

Make your simple syrup, use equal parts water to sugar, put it in a sauce pan and heat over medium heat until all the sugar has dissolved, stirring a few times. Pull it off the heat and cool.

Put your martini glass into the freezer to chill.
Add some crushed ice (I take a few cubes and put them in a Ziploc baggie and bash them up) to your cocktail shaker with the mint leaves. Muddle them together until its slushy and the mint is evenly distributed throughout. Add ice to fill the shaker and add in the vodka, lemon-lime juice and simple syrup. Take your martini glass out of the freezer and run a lime wedge around the rim and dip it into sugar to rim the glass with a lollipop rim. Shake your cocktail shaker for 15 seconds and strain into your sugar rimmed martini glass. Garnish with a mint sprig or apple slice.

Baby Shower Cupcakes

When my best friend got pregnant I was beyond excited for her.  They have wanted a baby for a long time and its been a somewhat painful and trying few years but they hung in there and now have a beautiful baby girl set to arrive early next month.  Everything has gone wonderfully throughout the pregnancy and mom is a glowing beauty filled with love and excitement as she waits to meet her baby. She jokes that they should have their hands full if the baby is in any way as active (and rather opinionated) as she has been during this pregnancy. I cannot think of two people who will be better parents and I am looking forward to watching them experience the joyfulness of parenthood. Nothing can prepare someone for the feelings and bond you share for your child, I think for me that was the best surprise. These final weeks I will be anxiously waiting for the phone call in excited anticipation of meeting their new baby girl. I know I sound a bit like a gushy ding-dong which is not normally my style but I know how much being a mom has meant to me, in ways I never expected and I  just so happy she gets to experience it too.

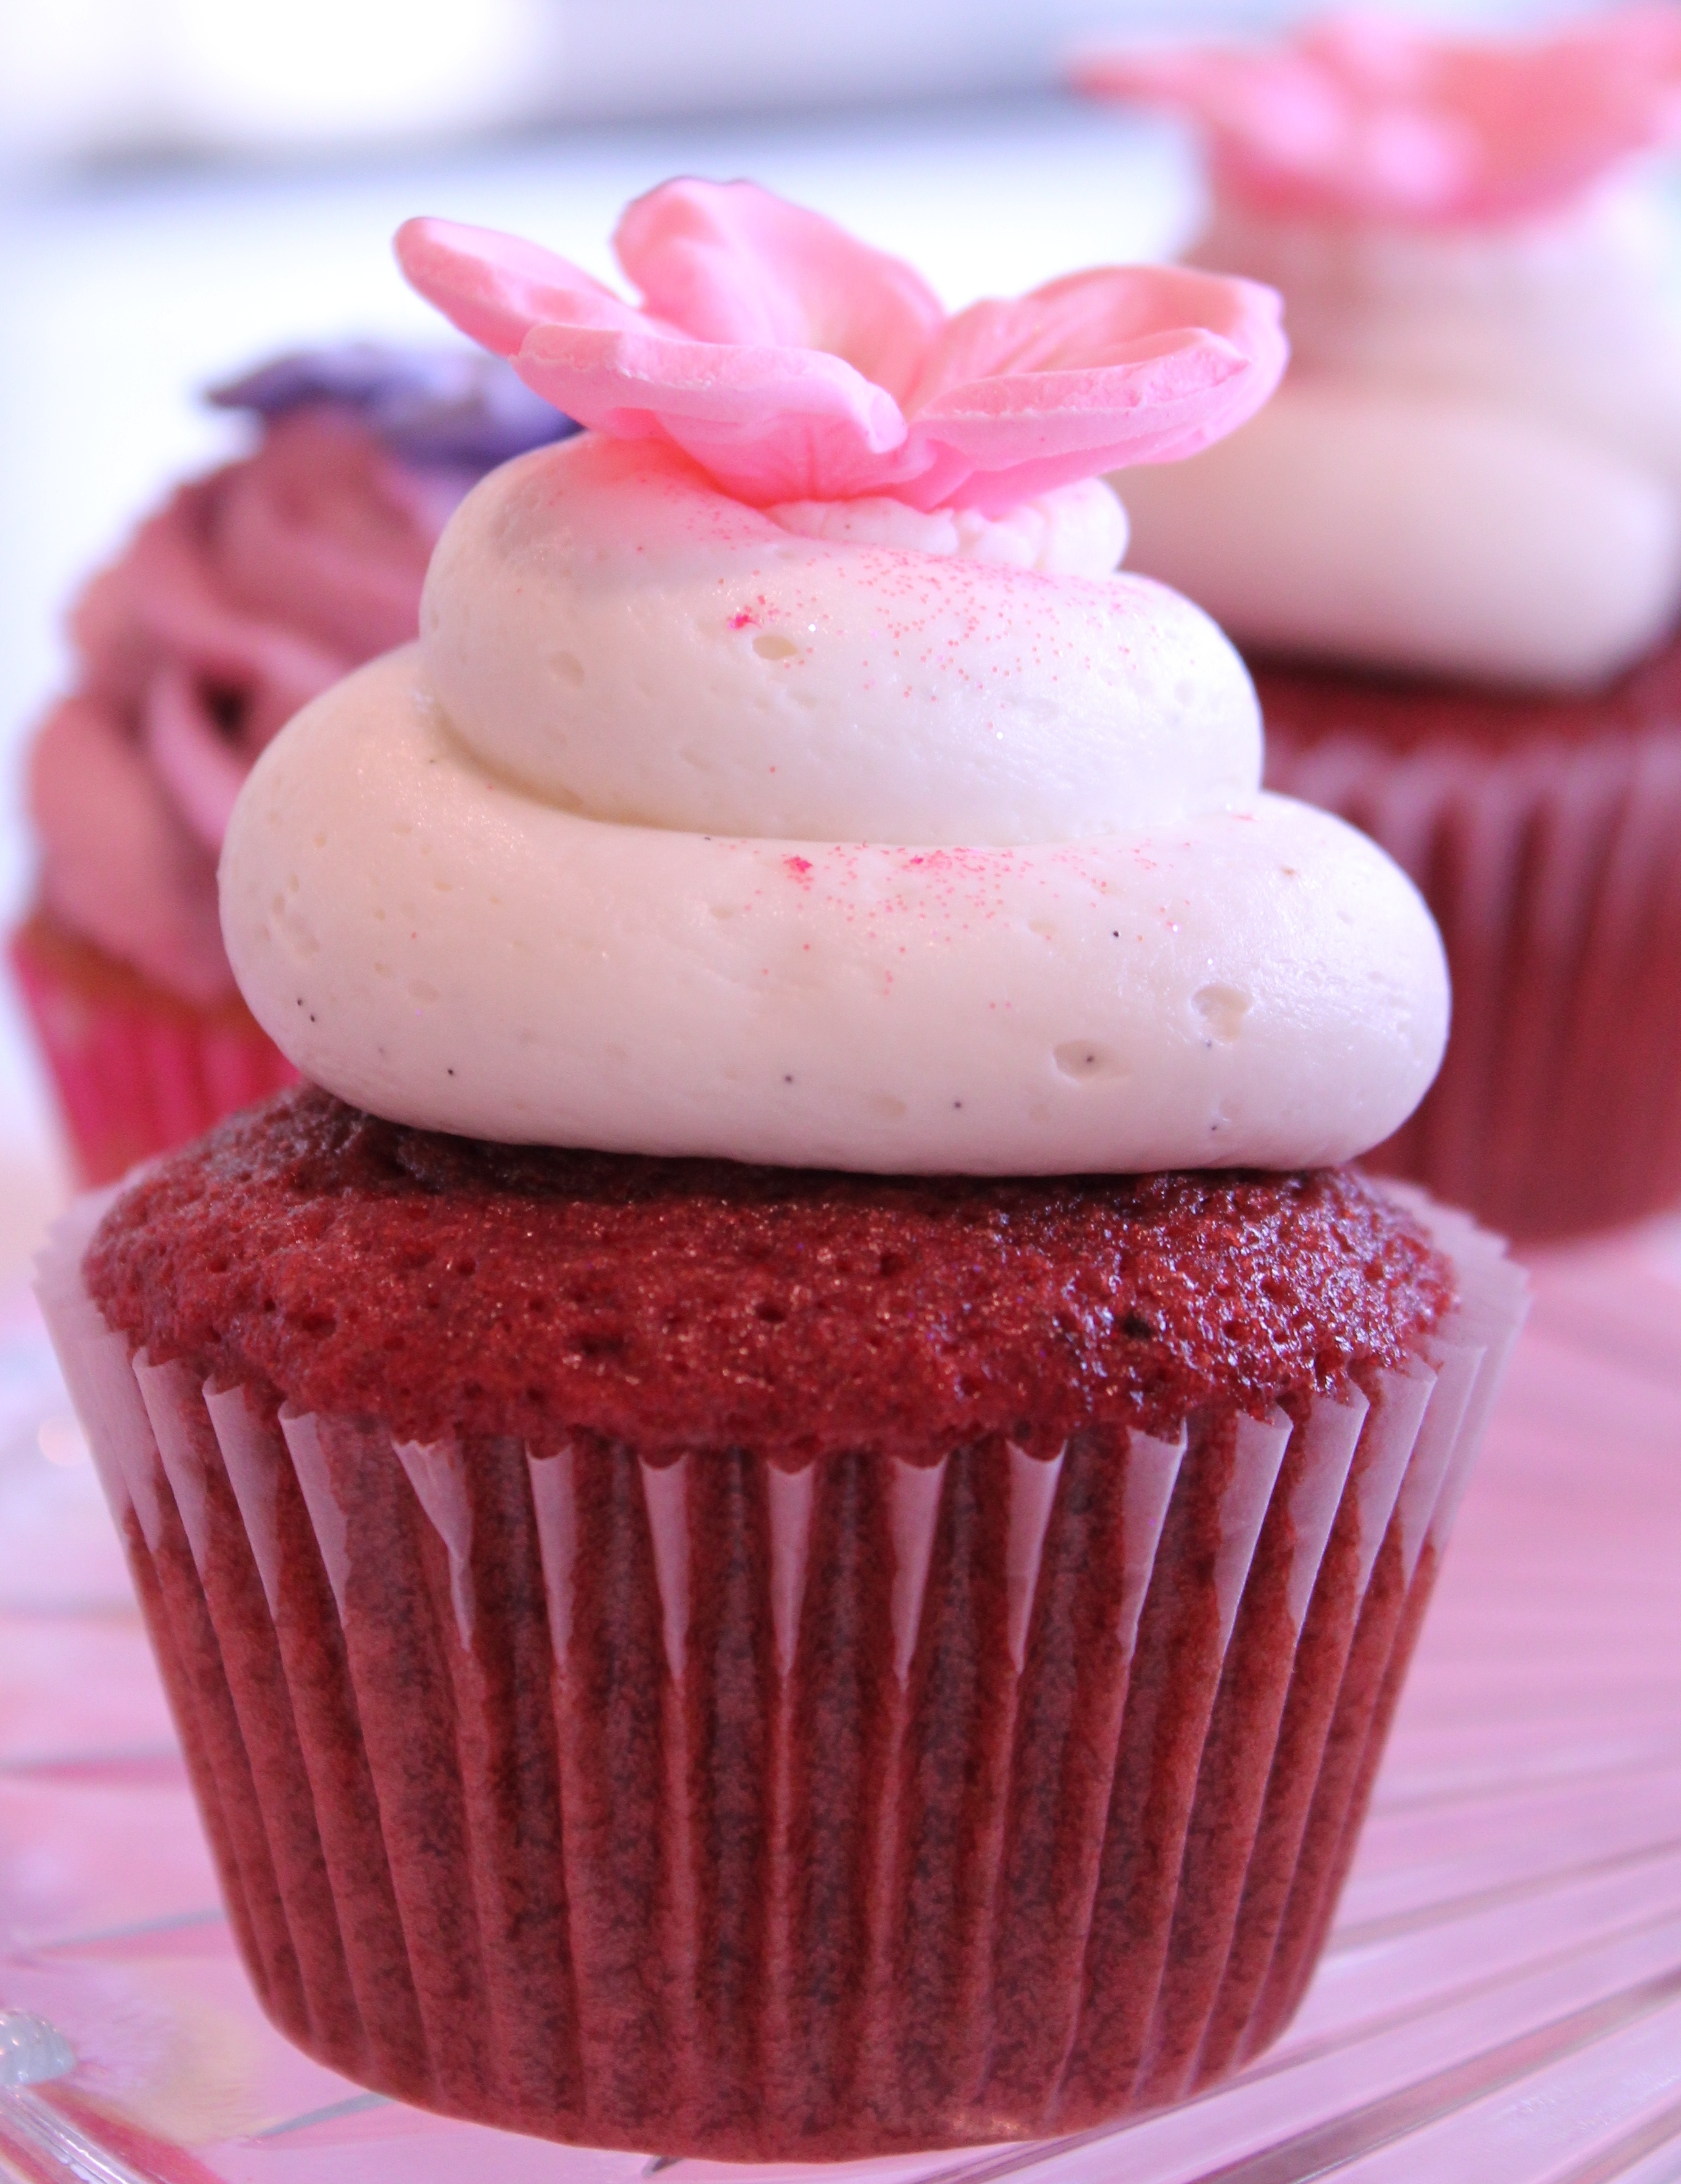
The shower itself was a tremendous success and a lot of fun. The cupcakes turned out very cute and it was one those times I felt the cake was cooked perfectly. That is not always easy to achieve with cupcakes,  perfection can be lost in just one extra minute.  For the cupcakes mommy to be chose a red velvet with cream cheese frosting and a vanilla cupcake filled with blackberry curd and a mascapone blackberry frosting. YUM, is all I can say. They were very good.

Recipes:

Triple Vanilla Cupcakes

Makes 20-24 cupcakes

By: Cupcake Bakeshop

  •  ¾ cup (1 ½ sticks) unsalted butter at room temperature
  • 1 2/3 cups vanilla sugar*
  • 2 large eggs at room temperature
  • 2 2/3 cups flour
  • 1 ½ teaspoons baking powder
  • ¼ teaspoon salt
  • ¾ cups + 2 tablespoons milk
  • 1 teaspoon vanilla extract
  • ½ vanilla bean, seeds scraped out

In a medium bowl, measure out flour, baking powder and salt, whisk to combine.

Measure out the milk and vanilla, stir to combine. In your electric mixer, beat butter until softened. Add sugar and beat until light and fluffy, about three minutes.

Add about a third of the dry ingredients to the butter/sugar and beat to combine. Add half of the milk mixture and beat to combine, continuing alternating between dry and wet finishing out with the dry. Beat to combine but don’t go crazy and mix it too much. Scoop batter into cupcake cups about 2/3 full. Bake the cupcakes for about 22-25 minutes or until they spring back when touched or your cake tester comes out clean.

This blackberry curd is pure heaven, I cannot think of what it wouldn’t taste good on and the best part, you can use frozen berries so it’s a treat for any time of year.

Black berry curd

Adapted from:  Use Read Butter 

  • 4 cups of blackberries, fresh or frozen-thawed
  • ½ cup water
  • 1 tsp orange zest (I have used lemon too and it’s just as good)
  • 1 cup sugar
  • 2 ounces of butter
  • 4 tablespoons of cornstarch
  • 4 tablespoons of water

Puree blackberries in a food processor and strain through a fine mesh sieve. Put the blackberry puree, water and zest into a pan and bring to a boil. Reduce and simmer for 5 minutes. Reduce heat to medium and stir in 1 cup of sugar and 2 ounces of butter. Mix the cornstarch and water together in a small bowl. While whisking the berry mixture, pour the cornstarch into the pan. Keep stirring until thick and bubbly and stir for another 3 minutes. Remove from heat and let it cool with a piece of plastic wrap over the top. You can at this point put it in another container to cool, I always press plastic wrap directly onto the curd even in a Tupperware container.  

Blackberry Mascarpone Cream Frosting:

Adapted from: Not So Humble Pie 

  • 1 pound mascarpone cheese
  • 2/3 cup of blackberry curd
  • 2 cups heavy cream
  • 7 tablespoons sugar 

Beat the sugar and cream to soft peaks in your mixer, gently transfer to another bowl. Combine the mascarpone and blackberry curd in the mixer bowl and mix. Then add the cream to the mascarpone mixture. Gently fold to combine until no more streaks remain.  

Assembly: Once the cupcakes have cooled completely, cut a cone shaped piece out of the center of the cupcake; place a spoonful of blackberry curd in the hole and place the top back on. (You may need to trim the point of the cone for it to fit back on- oh darn, scraps to eat!)  Then place your frosting in a piping bag and pipe a swirl on top of each cupcake.  


So far I have always used this recipe for red velvet, there must be a million variations out there but I have had such good consistent results with this one I have never tried another.

Red Velvet cupcakes

Taken directly from: Martha Stewart cupcakes

Yield Makes 24

Ingredients

  • 2 1/2 cups cake flour (not self- rising), sifted
  • 2 tablespoons unsweetened Dutch-process cocoa powder
  • 1 teaspoon salt
  • 1 1/2 cups sugar
  • 1 1/2 cups vegetable oil
  • 2 large eggs, room temperature
  • 1/2 teaspoon red gel-paste food color (or an entire 1.5 oz bottle of liquid)
  • 1 teaspoon pure vanilla extract
  • 1 cup buttermilk, room temperature
  • 1 1/2 teaspoons baking soda
  • 2 teaspoons distilled white vinegar

Directions

  1. Preheat oven to 350 degrees. Line standard muffin tins with paper liners. Whisk together cake flour, cocoa, and salt.
  2. With an electric mixer on medium-high speed, whisk together sugar and oil until combined. Add eggs, one at a time, beating until each is incorporated, scraping down sides of bowl as needed. Mix in food color and vanilla.
  3. Reduce speed to low. Add flour mixture in three batches, alternating with two additions of buttermilk, and whisking well after each. Stir together the baking soda and vinegar in a small bowl (it will foam); add mixture to the batter, and mix on medium speed 10 seconds-do not skip this step, it important!
  4. Divide batter evenly among lined cups, filling each two-thirds full. Bake, rotating tins halfway through, until a cake tester inserted in centers comes out clean, about 20 minutes. Transfer tins to wire racks to cool completely before removing cupcakes. Cupcakes can be stored overnight at room temperature, or frozen up to 2 months, in airtight containers.


This is my go-to cream cheese recipe, it has wonderful flavor and holds up beautifully for piping swirls.  

Vanilla Bean Cream Cheese Frosting

By: Cupcake Bakeshop

  • 2 sticks (1 cup) unsalted butter, room temperature
  • 1 package (8 ounces) cream cheese
  • 2 teaspoons vanilla extract
  • ¼ vanilla bean, seeds scraped out*
  • 4-5 cups powdered sugar (sifted)

With an electric mixer, beat the butter at medium speed until creamy.

Add the cream cheese and beat until combined

Add the vanilla extract, vanilla seeds, and 3 cups of powder sugar and start on low speed, scraping down side of the bowl as needed and work your way up to medium speed again until light and fluffy. Add more powder sugar until you get the consistency you need, more is better if you are piping cupcakes. Place frosting in a pastry bag with the tip of your choice and pipe onto the cupcakes, you can be generous with this recipe. 


 *Make sure you take this empty pod and put it in your vanilla sugar container, which is something everyone should have!  :) see…Love for vanilla beans.

On another note, I have to apologize for my lack of posts this summer. I have made and photographed tons of food but had very little time to put it together on here.  I have had a summer filled with weddings and baking and I am looking forward to things slowing down this fall. I have many, many things to share with everyone, so I am hoping for a fall full of new posts.

Cilantro Martini

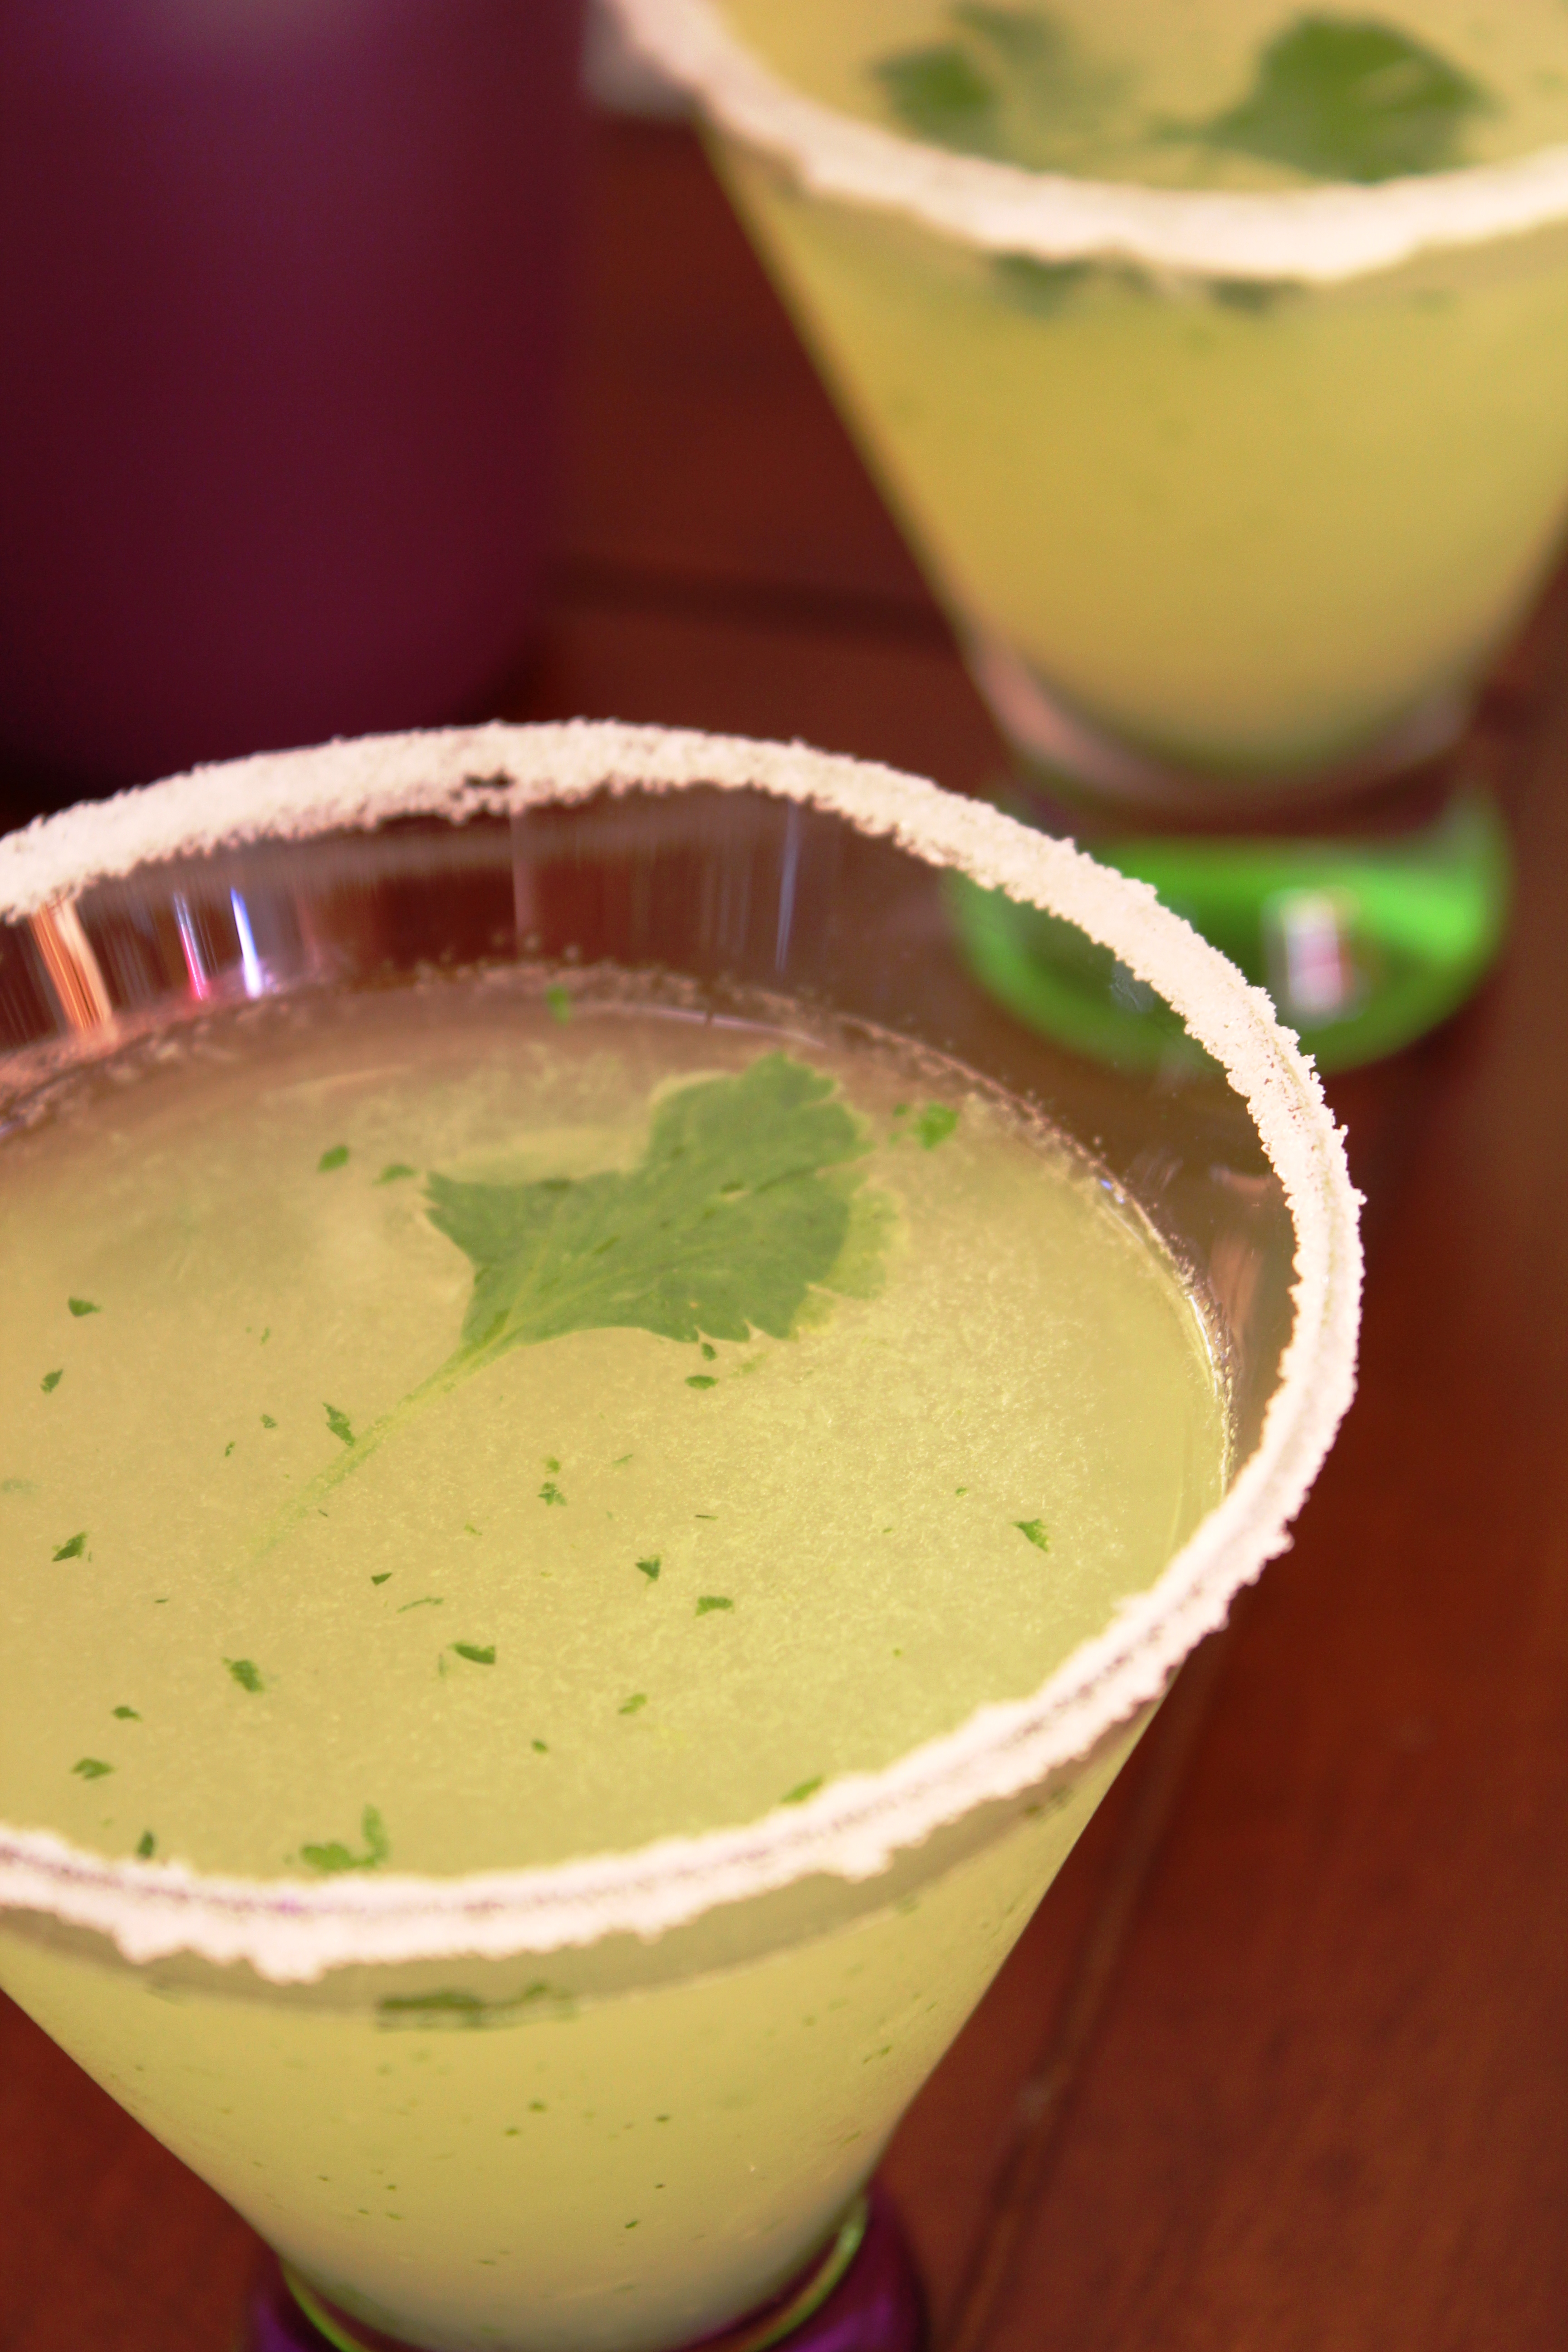
I wanted to get this drink recipe out as quickly as possible because its that good. I am not as easily impressed by drinks these days but this one really surprised me, it has a wonderful flavor without being too herb-y. If you hate cilantro (Mom) then this is not the drink for you, but if you don’t mind it then don’t let the strangeness of an herb being in your drink stop you from trying it. The cilantro flavor is very mild and incredibly refreshing. Both my husband and I thought is drink is the best we have had in a long time. So get yourself some cilantro and drink up, you wont be disappointed.

Cilantro Martini:

From the book: Hip Sips

Crushed Ice (I crush two cubes)

5 to 7 fresh Cilantro leaves

2 1/2 ounces of your favorite Vodka

1 ounce fresh Lemon-Lime juice

1 ounce Simple Syrup

Lollipop Rim

Muddle the crushed ice and cilantro leaves in a cocktail strainer until the ice is slushy and the cilantro is evenly smashed among the ice. Add the vodka, lemon lime juice and simple syrup, then fill the shaker with ice and shake vigorously for 10 seconds. Strain into a martini glass rimmed with the lollipop rim. Enjoy.  Makes one drink.

For the simple syrup, take equal part sugar and water put them in a sauce pan and heat up until it comes to a boil or the sugar dissolves. Let it cool.

For the lollipop rim, simply take superfine or regular sugar and put it on a plate, run a lime across the top of the glass and dip it into the sugar, to rim it.

Lemon/Lime juice is simply equal parts fresh lemon and fresh lime juice. Make a bunch and freeze it in ice cubes for later!

Pasta with Shrimp, Asparagas & Herbed Goat Cheese

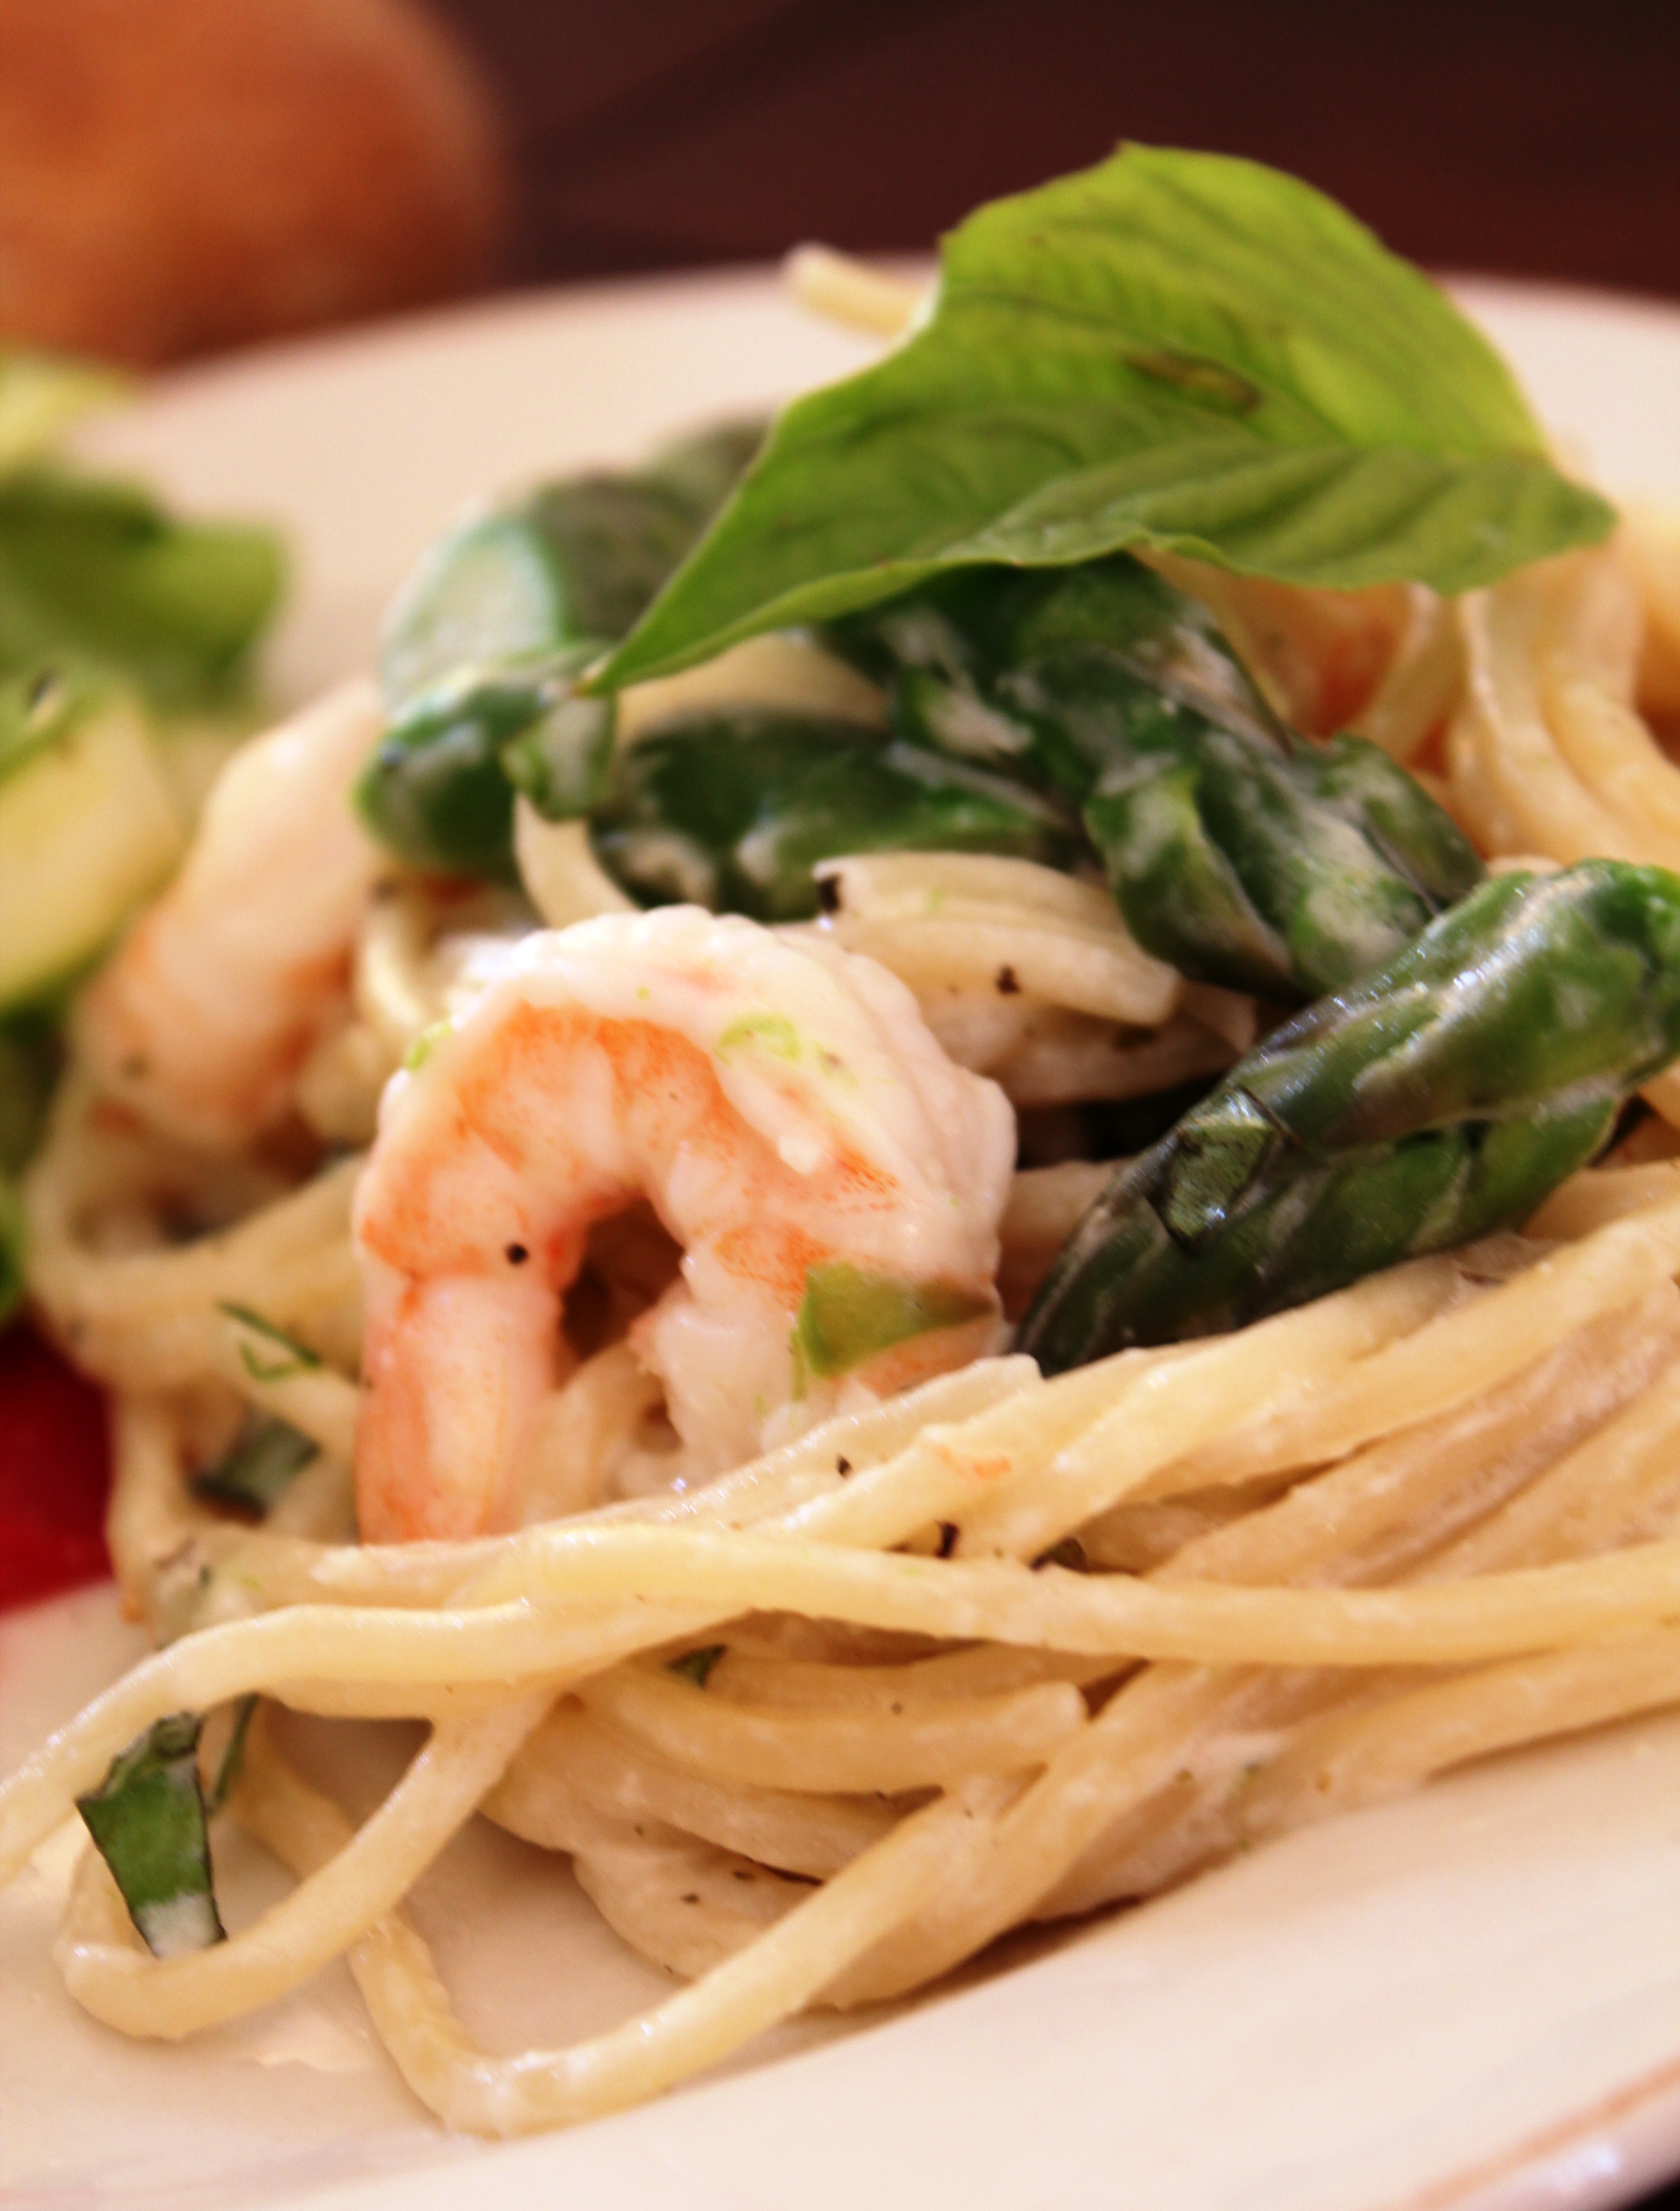
This is a very simple dish, one of my favorites for a weeknight dinner.  And as a plus, most of the time Gattor will eat it (ha the fickleness of a three-year old). I also love the flexibility it has, you can adjust it to your taste or simply according to what you have on hand. This particular  time I didn’t have herbed goat cheese, so you will notice in the picture the sauce is lacking the specks of herbs, it was still great but the herbed goat cheese is definitely better.  Another note make sure to read this recipe all the way through before you start because you will be boiling the pasta while you cook the shrimps. If you get all your ingredients out and ready it makes this dish cook in a flash.

Shrimp and pasta with herbed goat cheese.

adapted from: Cooking light

12 ounces uncooked angel hair pasta (or any pasta of your choice)
6 tablespoons (3oz) herb-flavored goat cheese
1/3 cup chopped fresh basil
1/4 teaspoon salt
1/4 teaspoon pepper
1 tablespoon olive oil
1 1/2 teaspoons minced garlic
2 cups chopped asparagus

3/4  pound large shrimp, peeled and deveined

2/3 cup chicken broth

other options:
2 cups cherry tomatoes, halved
2 cups snap peas

1. Cook pasta in boiling water 10 minutes or until al dente, add asparagus during final 2 minutes of cooking. Drain pasta and asparagus and place in a bowl. Add cheese, basil, salt and pepper, stir until well blended.
2. While pasta cooks, heat oil in a large skillet over medium high heat. Add garlic, saute 30 seconds.  Add  shrimp and cook about 5 minutes or until shrimp are almost done . Add broth, cook 1 minute or until shrimp are done. Add shrimp mixture to pasta mixture, toss gently to combine. Yield: 4 servings (serving size: about 1 1/2 cups.)

Chocolate x3

With another birthday at work comes another request, this one however was for all chocolate. What could be more fun than trying to come up with three ways to put chocolate together? And why stop there, if you get exact, there is actually 4 ways chocolate is used in these. You have my go to devils food cupcake which is filled with chocolate pastry cream, then topped with rich creamy Chocolate Swiss Meringue butter cream then sprinkled with a white chocolate drizzle. Well, that was the plan, then I went a little bonkers with the white chocolate shavings and chocolate sprinkles. I am not usually a chocolate cupcake girl, I will almost always choose a vanilla cupcake over chocolate and chocolate frosting has never been something I was fond of. This frosting however changed all that, I really, really liked it. Its not too rich, not too chocolaty, its smooth and creamy and light. (That is light on taste not calories!)

And again, these were night photos, I tried using a halogen light and instead of super yellow they now look freakishly psychedelic. That is probably why its taken me so long to post these cupcakes and they deserve better, they were delicious.

Recipes:

Devils Food chocolate cupcakes- this is my go -to recipe for chocolate cupcakes

Chocolate Pastry Cream:

Recipe from: Carroll Pellegrinelli

Ingredients:

  • 2-1/4 cups milk
  • 4 egg yolks
  • 2/3 cups sugar
  • 1/4 cup cornstarch
  • 1/4 cup flour
  • 2 tablespoons vanilla extract
  • 3 ounces semisweet chocolate, melted
  • 1 ounce unsweetened chocolate, melted

Preparation:

Boil 2 cups of milk. Beat yolks with sugar and remaining milk. Whisk until smooth. Add cornstarch and flour until combined. Gradually whisk hot milk into egg mixture (take your time with this step, drizzle very slowly). Return to saucepan. Cook over medium heat, stirring constantly until mixture boils and thickens. Reduce to low and stir for 2 minutes longer. Remove from heat. Stir in vanilla and melted chocolates. Pour into a shallow disk. Cover with plastic wrap. (Make sure wrap touches surface to prevent a skim from forming.) Cool to room temperature  (you can put it in an ice bath to speed this up). Refrigerate for 2 hours or overnight. Makes approximately 3 cups.

Chocolate Swiss Meringue Buttercream:

From Martha Stewart Cupcakes

  • Yield Makes about 5 cups

Ingredients

  • 4 ½ ounces semisweet chocolate
  • 5 large egg whites
  • 1 cup plus 2 tablespoons sugar
  • Pinch of salt
  • 1 pound (4 sticks) unsalted butter, cut into tablespoons, room temperature
  • 1 1/2 teaspoons pure vanilla extract

Directions

  1. Melt  4 1/2 ounces semisweet chocolate, let it sit until cooled. (It should be cool by the time you need to add it in step 3.
  2. Combine egg whites, sugar, and salt in the heatproof bowl of a standing mixer set over a pan of simmering water. Whisk constantly by hand until mixture is warm to the touch and sugar has dissolved (the mixture should feel completely smooth when rubbed between your fingertips or gets to 140 degrees F ).
  3. Attach the bowl to the mixer fitted with the whisk attachment. Starting on low and gradually increasing to medium-high speed, whisk until stiff (but not dry) peaks form. Continue mixing until the mixture is fluffy and glossy, and completely cool (test by touching the bottom of the bowl), about 10 minutes. Set your timer, it makes life much simpler.
  4. With mixer on medium-low speed, add the butter a few tablespoons at a time, mixing well after each addition. If for some reason your frosting now resembles curdled milk, don’t freak out, just keep beating it; it will come back I promise. Once all butter has been added, whisk in vanilla and cooled melted chocolate. Switch to the paddle attachment, and continue beating on low speed until all air bubbles are eliminated, about 2 minutes. Scrape down sides of bowl with a flexible spatula, and continue beating until the frosting is completely smooth. Keep butter cream at room temperature if using the same day. This frosting can be made ahead and refrigerated, if you do that, make sure you let it get to room temp before you re-beat it. If you are using the next day, simply take it out the refrigerator the night before and let it sit on the counter, it will be the perfect temperature to whip the next morning.

White chocolate drizzle: simply melt some white chocolate in a bowl in the microwave, 30 seconds at a time until melted. Then put the melted chocolate in a pastry bag (or Ziploc baggie- cut a tiny hole in the corner) and drizzle on assembled cupcakes.

Assembly: Cut a cone shaped hole out of  the center of each cupcake and put a fair amount of pastry cream in. Replace the tops to cover the cream (you may have to trim the cones). Then swirl the buttercream frosting on top and add your white chocolate drizzle and shaved chocolate. I added some pastry cream to the tops of some of the cupcakes because I had a bit left over and it looked cool. Have fun with it.

Cones placed back on-ready for frosting.

Bridal Shower Cupcakes

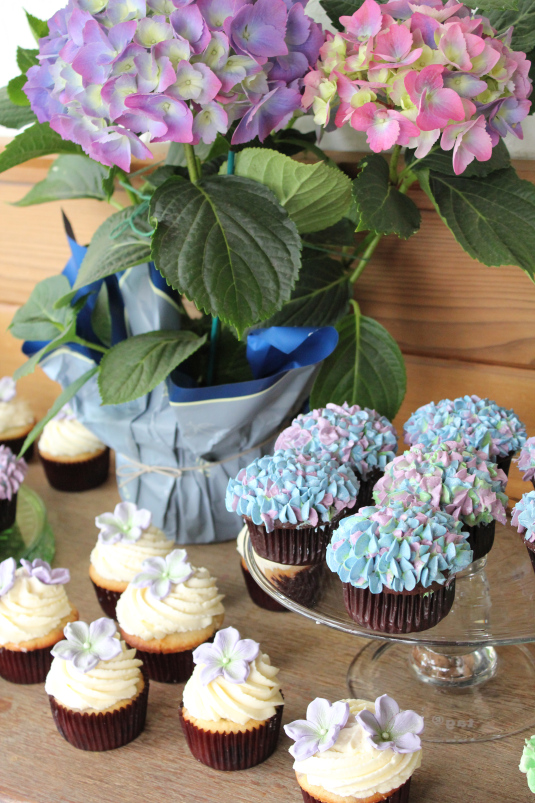
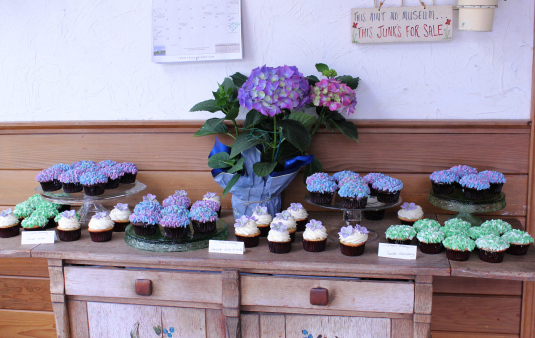
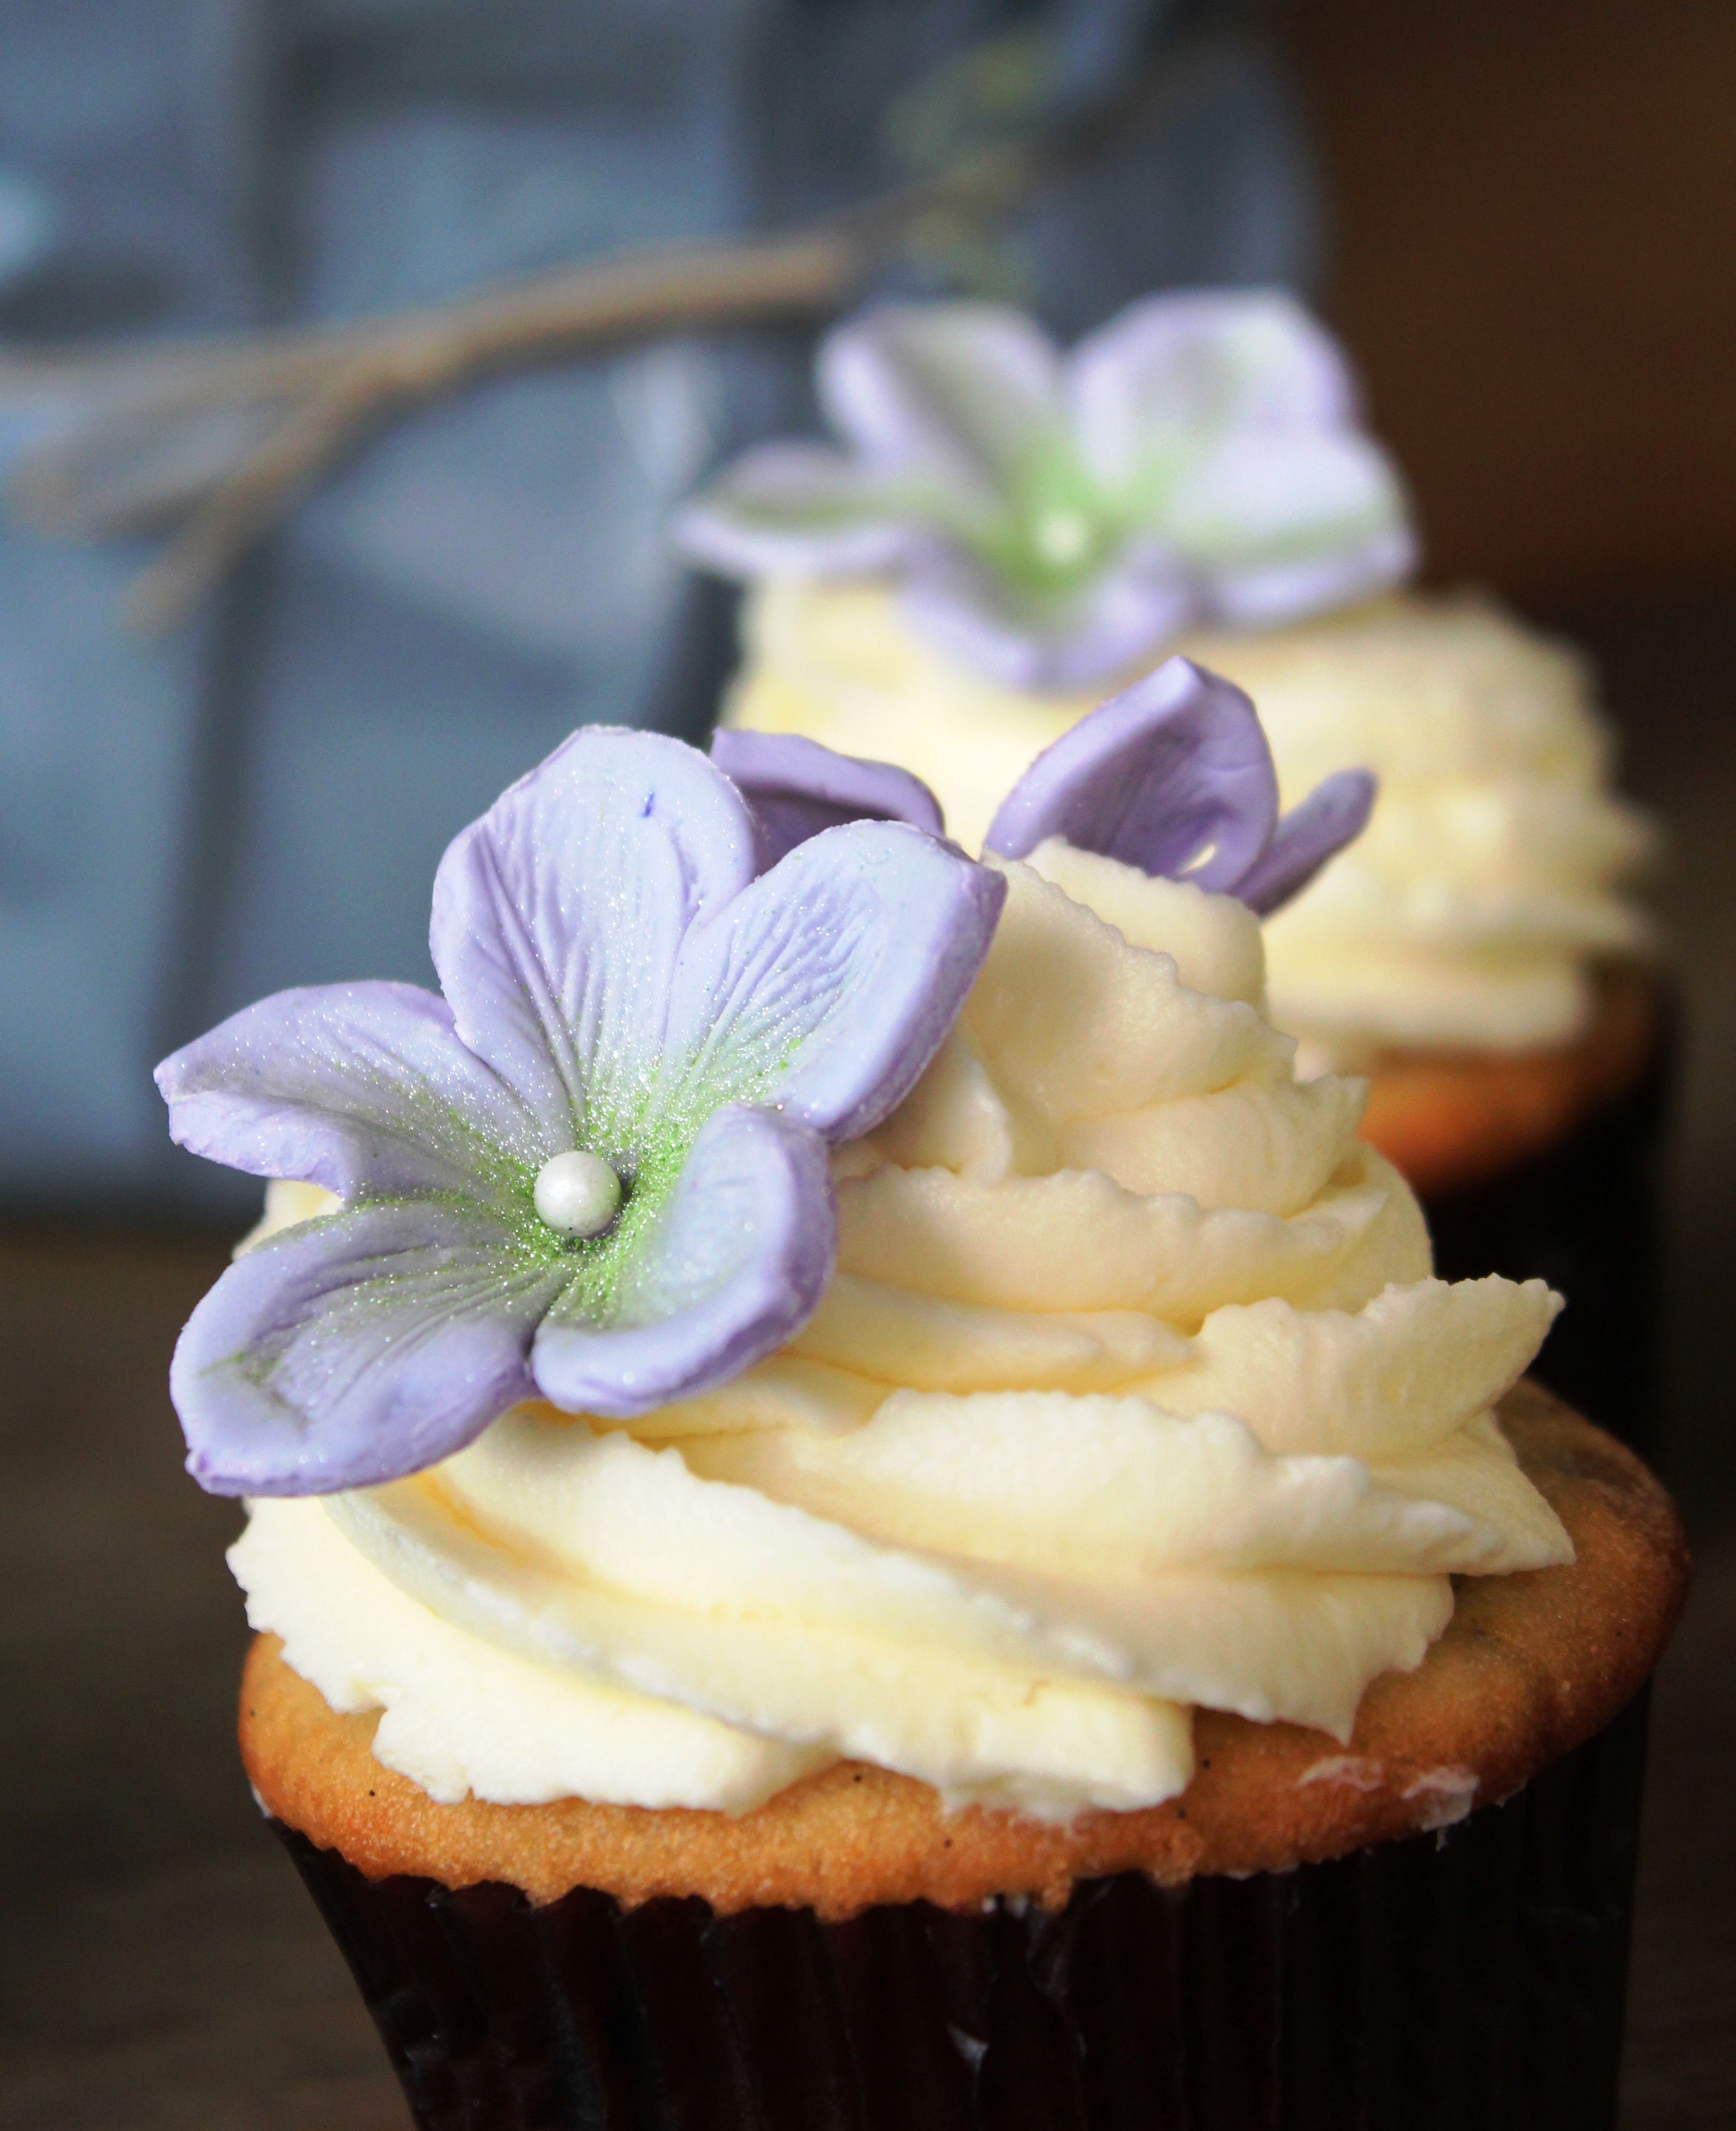
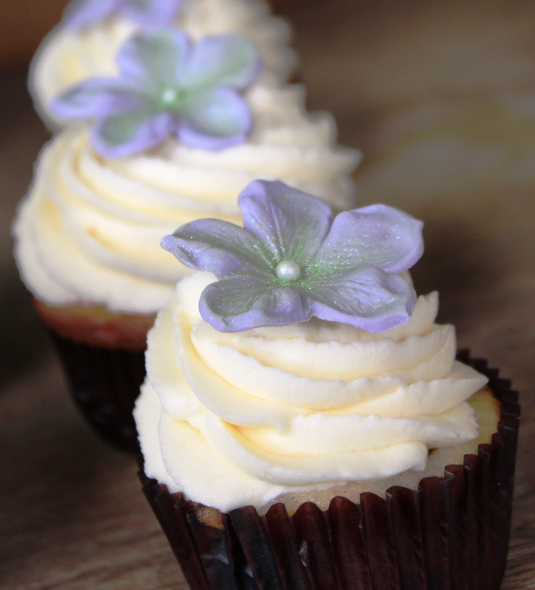
I got the honor of making cupcakes for my cousins bridal shower; the theme was  lavender and  green and the decor was natural and for whatever reason I found that rather intimidating. I knew swirls of bright colors or over-sprinkled cupcakes wouldn’t fly here, but I had been wanting to do more gum-paste flowers for a while and what better occasion to do them than a bridal shower. That was until I came across the Hydrangea cupcakes on Glorious Treats.   These cupcakes where simply fabulous and I knew I had to make them. Now, my cousin is very classy, she works for a winery in San Luis Obispo and also has a flower business called Noonan’s Wine Country Designs.  She is an incredible artist and has an eye for design like no one I know, so of course I freaked myself out a bit wanting to get this right.  I just knew the hydrangeas would fit right in and I thought making some of them green and white would add a unique modern element. But that left out my favorite gum paste flowers and I had been waiting so long to try them, so of course I did both. I tried to incorporate the lavender and green so they would add the cute factor without standing out too much and I am so glad I did because I loved them.

Overall, they were a success, both designs are actually very easy to do but somewhat time consuming.  Call it a labor of love.  Anyone without a three year old, mother’s day and a birthday party that same weekend could accomplish these with no problem. I myself had  some rather late nights and a few mommy dearest moments, but I am happy to say everyone survived. (Thank you mom for all your help and thank you to my husband for his reassurance as his panicked wife screeched at him “do they look ok, tell me do they really?”)

These cupcakes where a success in my book as well as an important learning step in my decorating and time management abilities. I encourage anyone who likes them to give it a try, they honestly are not that hard, as long as you have the tools you need its quite simple.  I might possibly post the recipes in the future but for now this is just a picture post. Enjoy and hopefully you will be inspired to try them too.

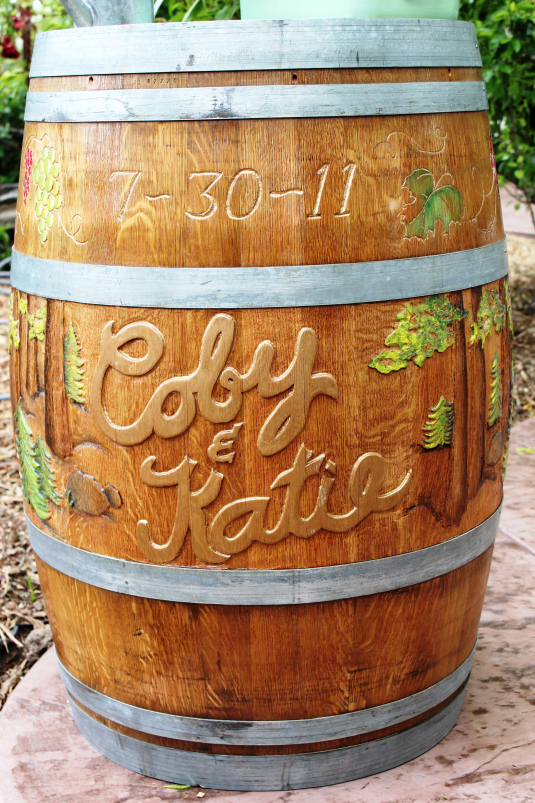
One of my cousin's good friend's father hand carved this barrel for them.

The entire spread, I just loved the wood cabinet.

Pretty purple flowers

I am still peeved I left my finger prints on the wrappers, never again will I be so sloppy.

Cupcake ideas from:

Glorious Treats

CakeJournal

Lemon Blueberry cupcakes

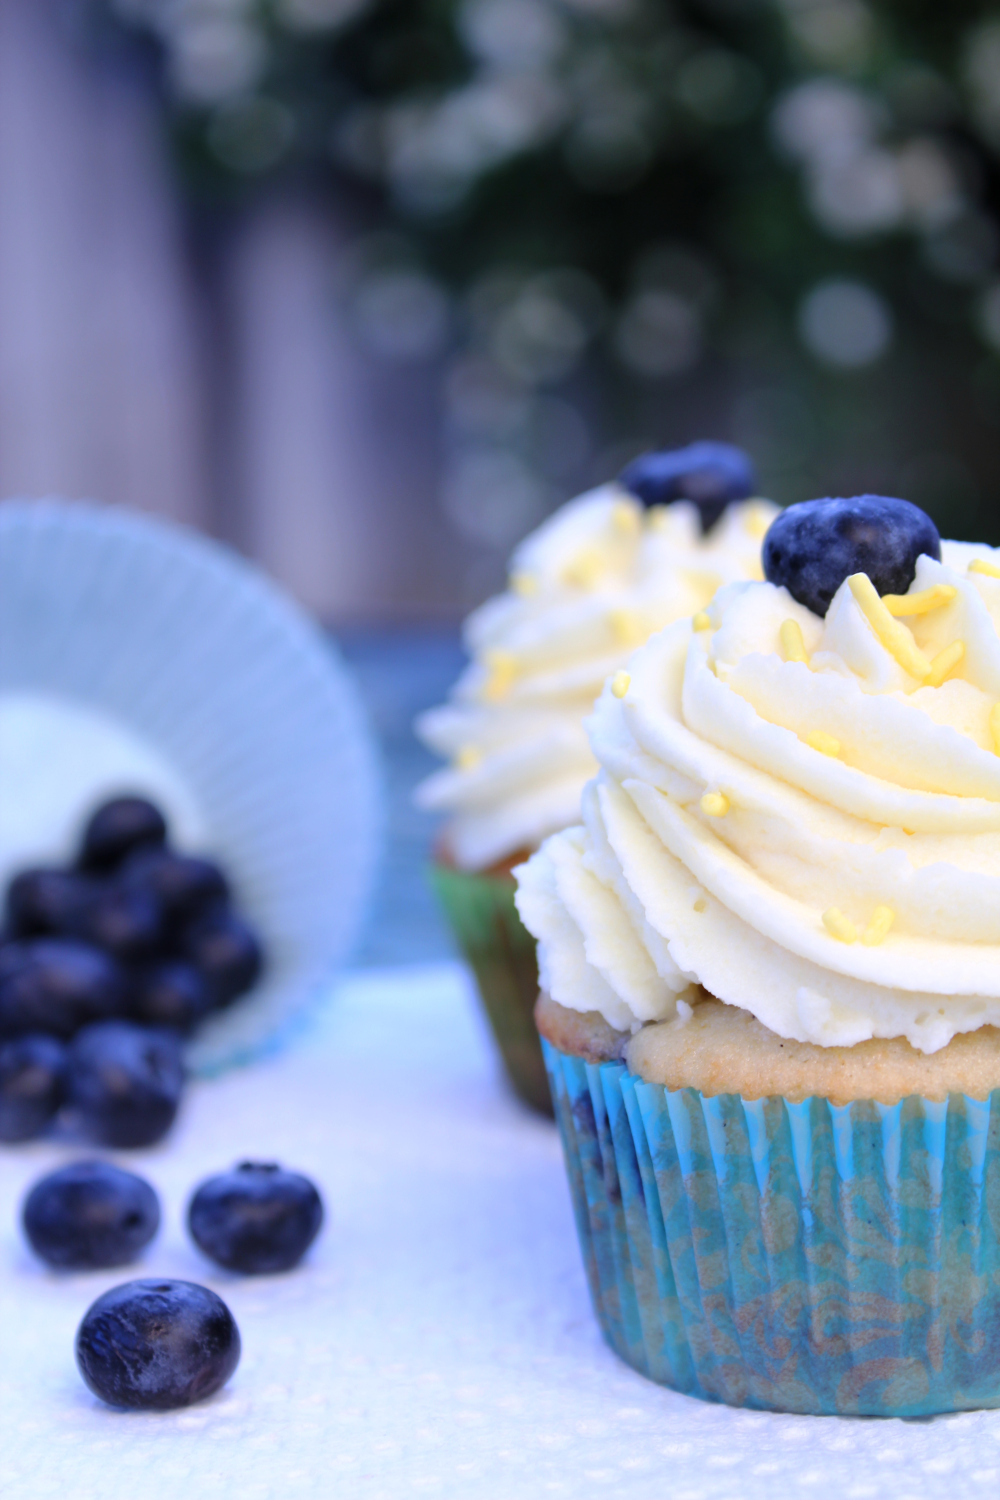
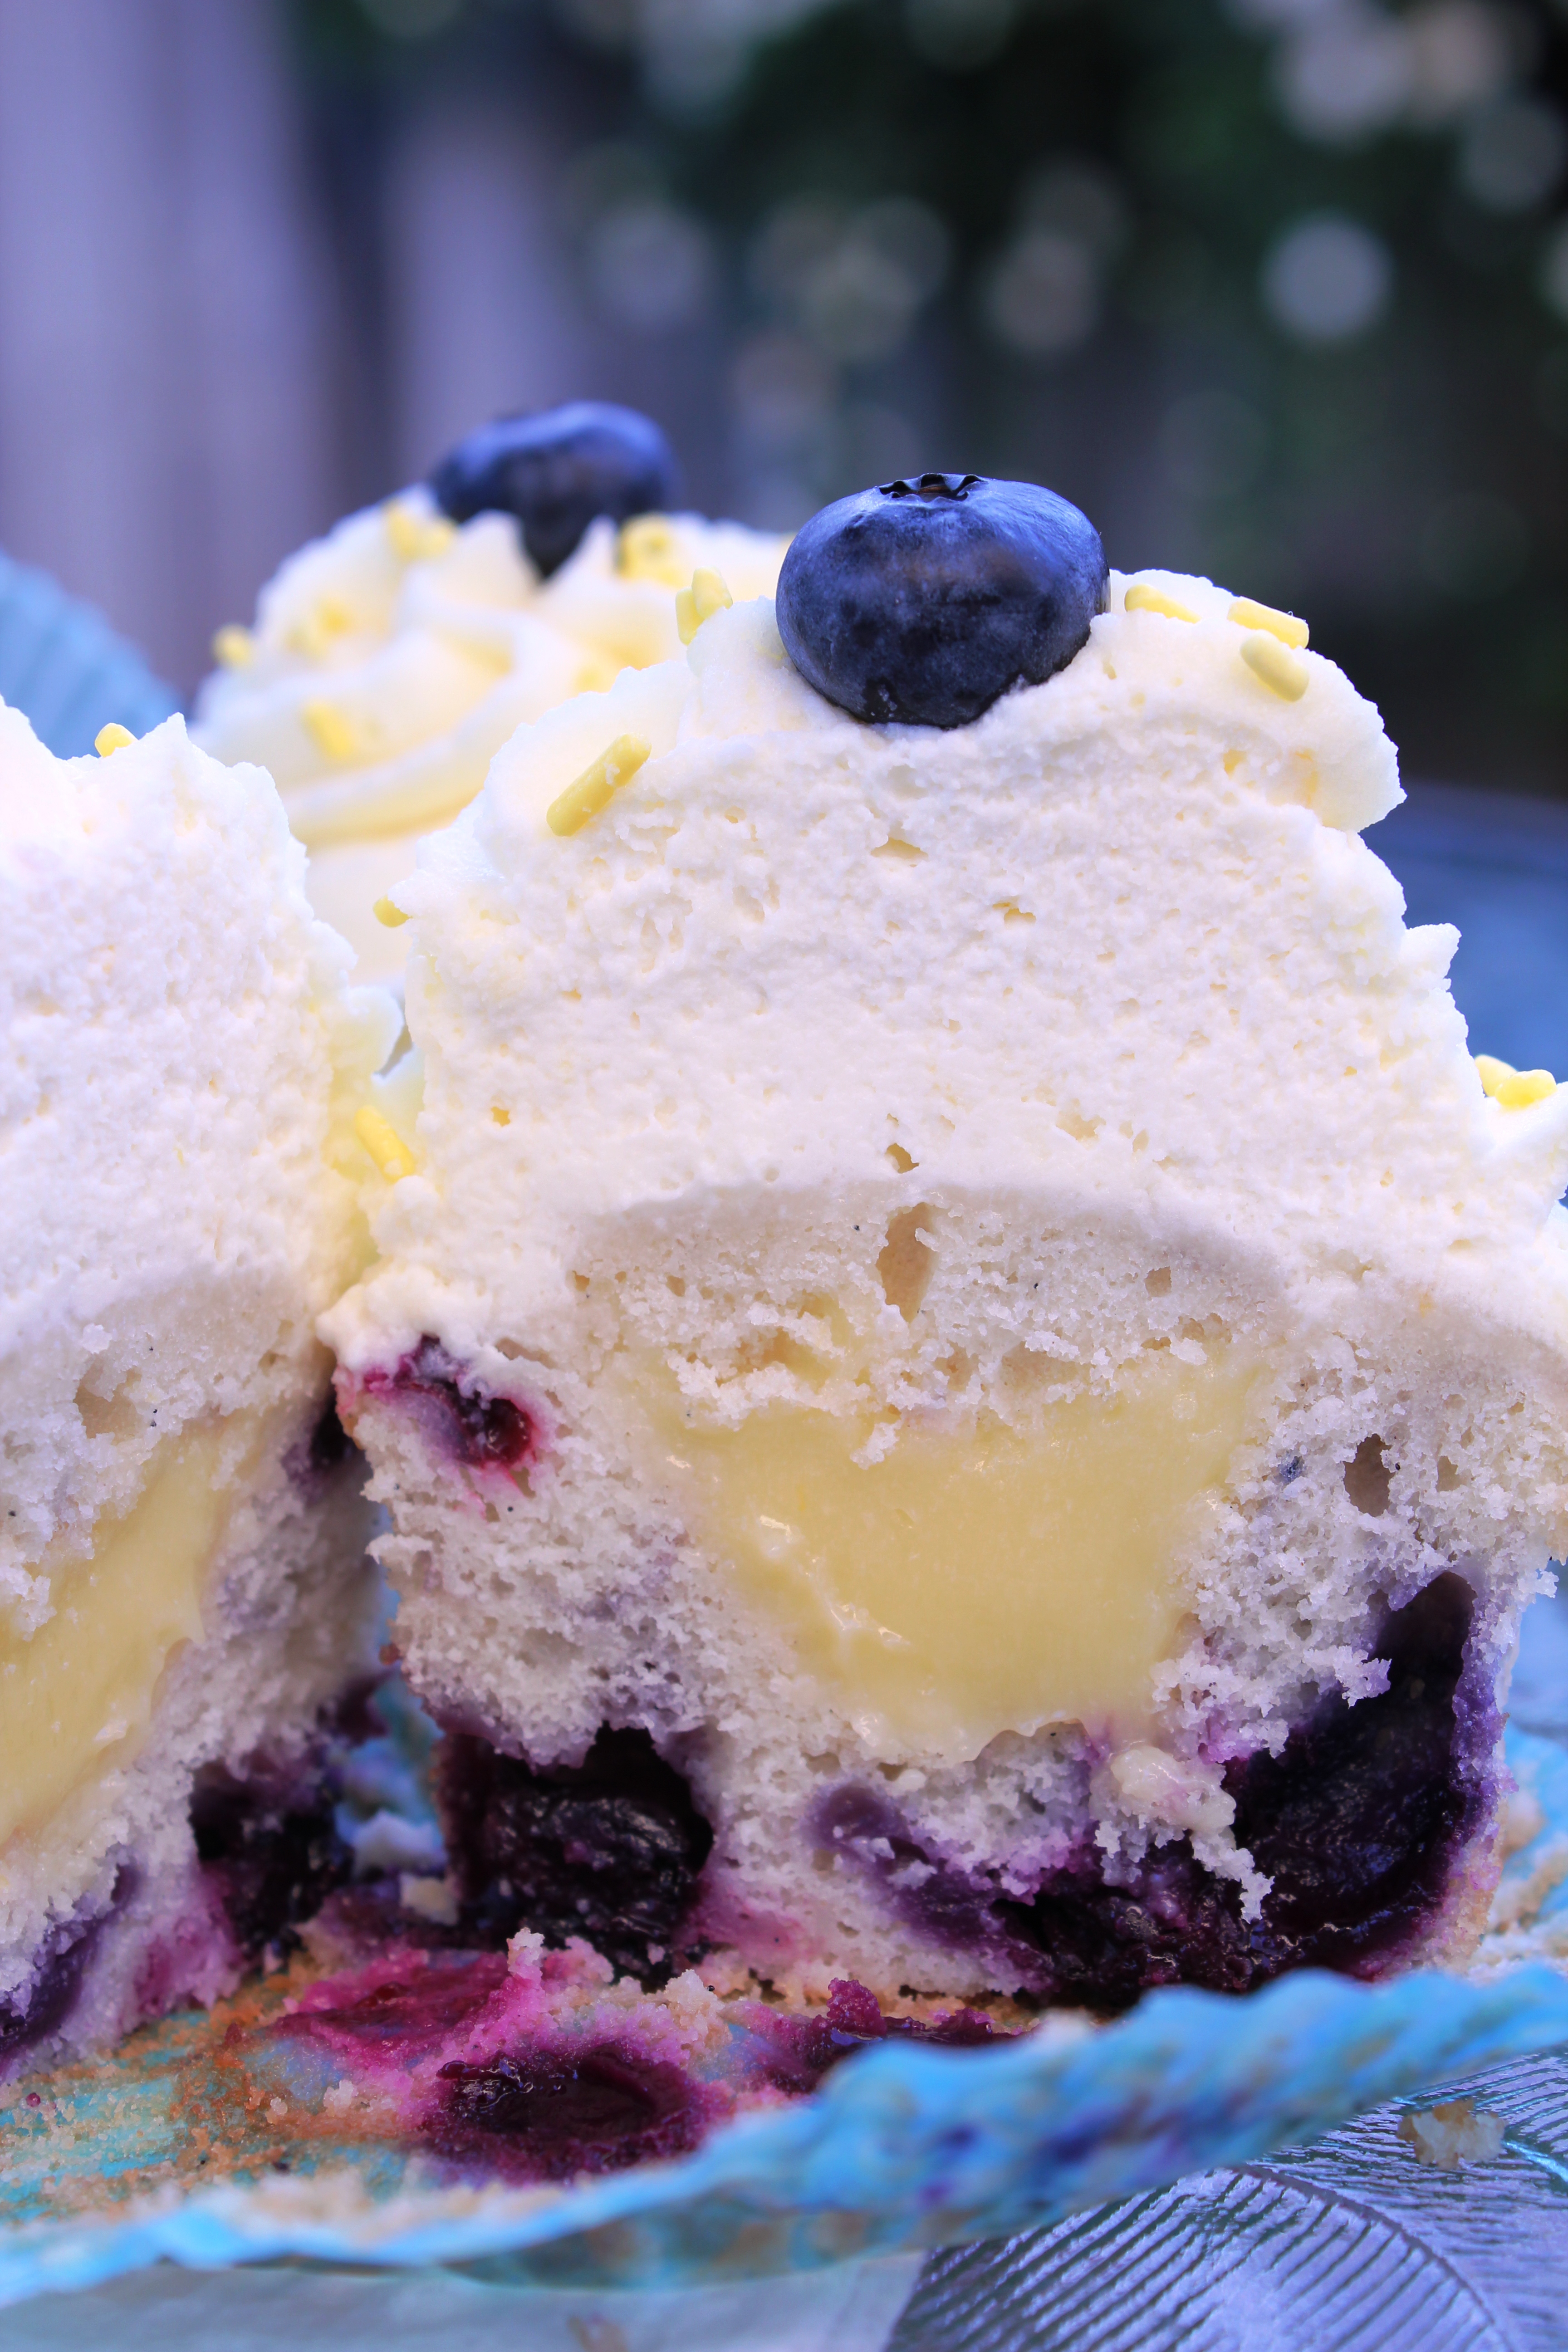
My BFF wanted something light and fresh for her birthday, this recipe looked fabulous and tasted even better. The combination of lemon and blueberries is very good not to mention biting into creamy lemon curd inside the cupcake. The recipe I used called for a lemon butter cream but I knew I wanted to use either a cream cheese or my favorite mascarpone frosting. After contemplating, I decided on the mascarpone, it really is delicious and so rich and creamy. I tweaked it a little bit to get a stiffer texture and it came out perfect. These cupcakes are as close to perfection as I have ever made.

If you can, take the time to make your own lemon curd it is really worth it. Filled cupcakes have really become my favorites and now I cannot imagine making cupcakes without.

Recipe:

Adapted from Sweetopolita

Lemon-Blueberry Cake

Ingredients

2 cups plus 6 tablespoons all-purpose flour

2 teaspoons baking powder

1 teaspoon salt

3 cups fresh blueberries

1/2 cup sour cream

1/2 cup whole milk

2 teaspoons vanilla extract

3/4 teaspoon pure lemon extract

1 teaspoon lemon zest

1 cup (2 sticks) unsalted butter, room temperature

1 1/2 cups white sugar

4 large eggs

Method

Preheat oven to 350°F. Prepare muffin tin with cupcake papers.  Sift dry ingredients into medium bowl. Transfer 1 tablespoon flour mixture to larger bowl. Add fresh blueberries and toss to coat them with flour. Set remaining flour mixture and blueberries aside.

Stir whole milk, sour cream, vanilla extract, lemon extract and lemon zest in small bowl. In the bowl of a stand mixer, cream butter and sugar, until pale yellow and very fluffy, about 5 minutes. Beat in eggs one at a time, until well combined. Mix in flour mixture alternately with milk mixture, starting and ending with flour mixture. Stir until just combined. Gently fold in blueberries. Divide batter equally among cupcake cups.

Bake cakes until toothpick inserted into center of a couple cupcakes comes out clean, about 20 minutes. Cool in pans on racks for about 10 minutes, then put onto racks until completely cool. Makes 24-26 cupcakes.

Adapted from: Not So Humble Pie

Update: If you would like your cupcakes generously filled double this recipe.

Lemon Curd
1/2 cup unsalted butter
1/2 cup lemon juice
zest of one large lemon ( I used 2)
3/4 cup granulated sugar
1 teaspoon cornstarch
pinch of salt
6 large egg yolks

Melt the butter in a medium sauce pan over medium-low heat.  Remove from heat and add the lemon juice and zest.

Mix together the sugar, salt and cornstarch and add it to the pan.  Whisk in the egg yolks until smooth and return to heat. Cook over medium-low heat for roughly 10 minutes until the mixture has thickened and coats the back of a spoon. Do not allow the mixture to boil.

Once thickened, strain the mixture though a fine mesh strainer into a large bowl. Allow to chill in the refrigerator completely before using.

Lemon Mascarpone Frosting:

adapted from: Not So Humble Pie

Lemon Mascarpone Cream Frosting

1 pound mascarpone cheese
2/3 cup lemon curd
2 cups heavy cream
7Tb sugar

Beat the sugar and cream to soft peaks in your mixer.

Combine the mascarpone and lemon curd in a separate bowl and mix. Add the cream to the mascarpone mixture. Gently fold to combine, take your time and be gentle. If the mixture is overworked it can separate or look grainy. To fix this add several tablespoons of heavy cream and mix with the spatula until smooth again.

Assembly: First measure out the 2/3 cup of lemon curd for the frosting and set aside. After the cupcakes are finished cooling, cut a cone shape out of the middle and remove the tops and put a tablespoon or so of lemon curd in the whole. Then place the tops back on (you may have to trim the cone a bit to get it to fit). I piped on the frosting with a large star tip but you could put it on however you like. Garnish with a washed and dried blueberry and yellow jimmys.

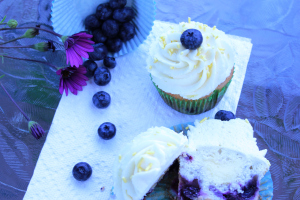
**Silly note: what you don’t see in all of these pictures, because I edited out the fingers, is Gattor, her face was about six inches from the cupcakes at all times. She came outside with me while I took the photos and was acting like a rabid beast trying to get her hand on the cupcakes. She kept playing with the blueberries, constantly asking me if I was done, she still doesn’t understand why mommy is always taking pictures of the food. I had promised her one and she almost fell apart when I cut one of them to show the inside. I assured her she could have the “un damaged” one and she was happy.

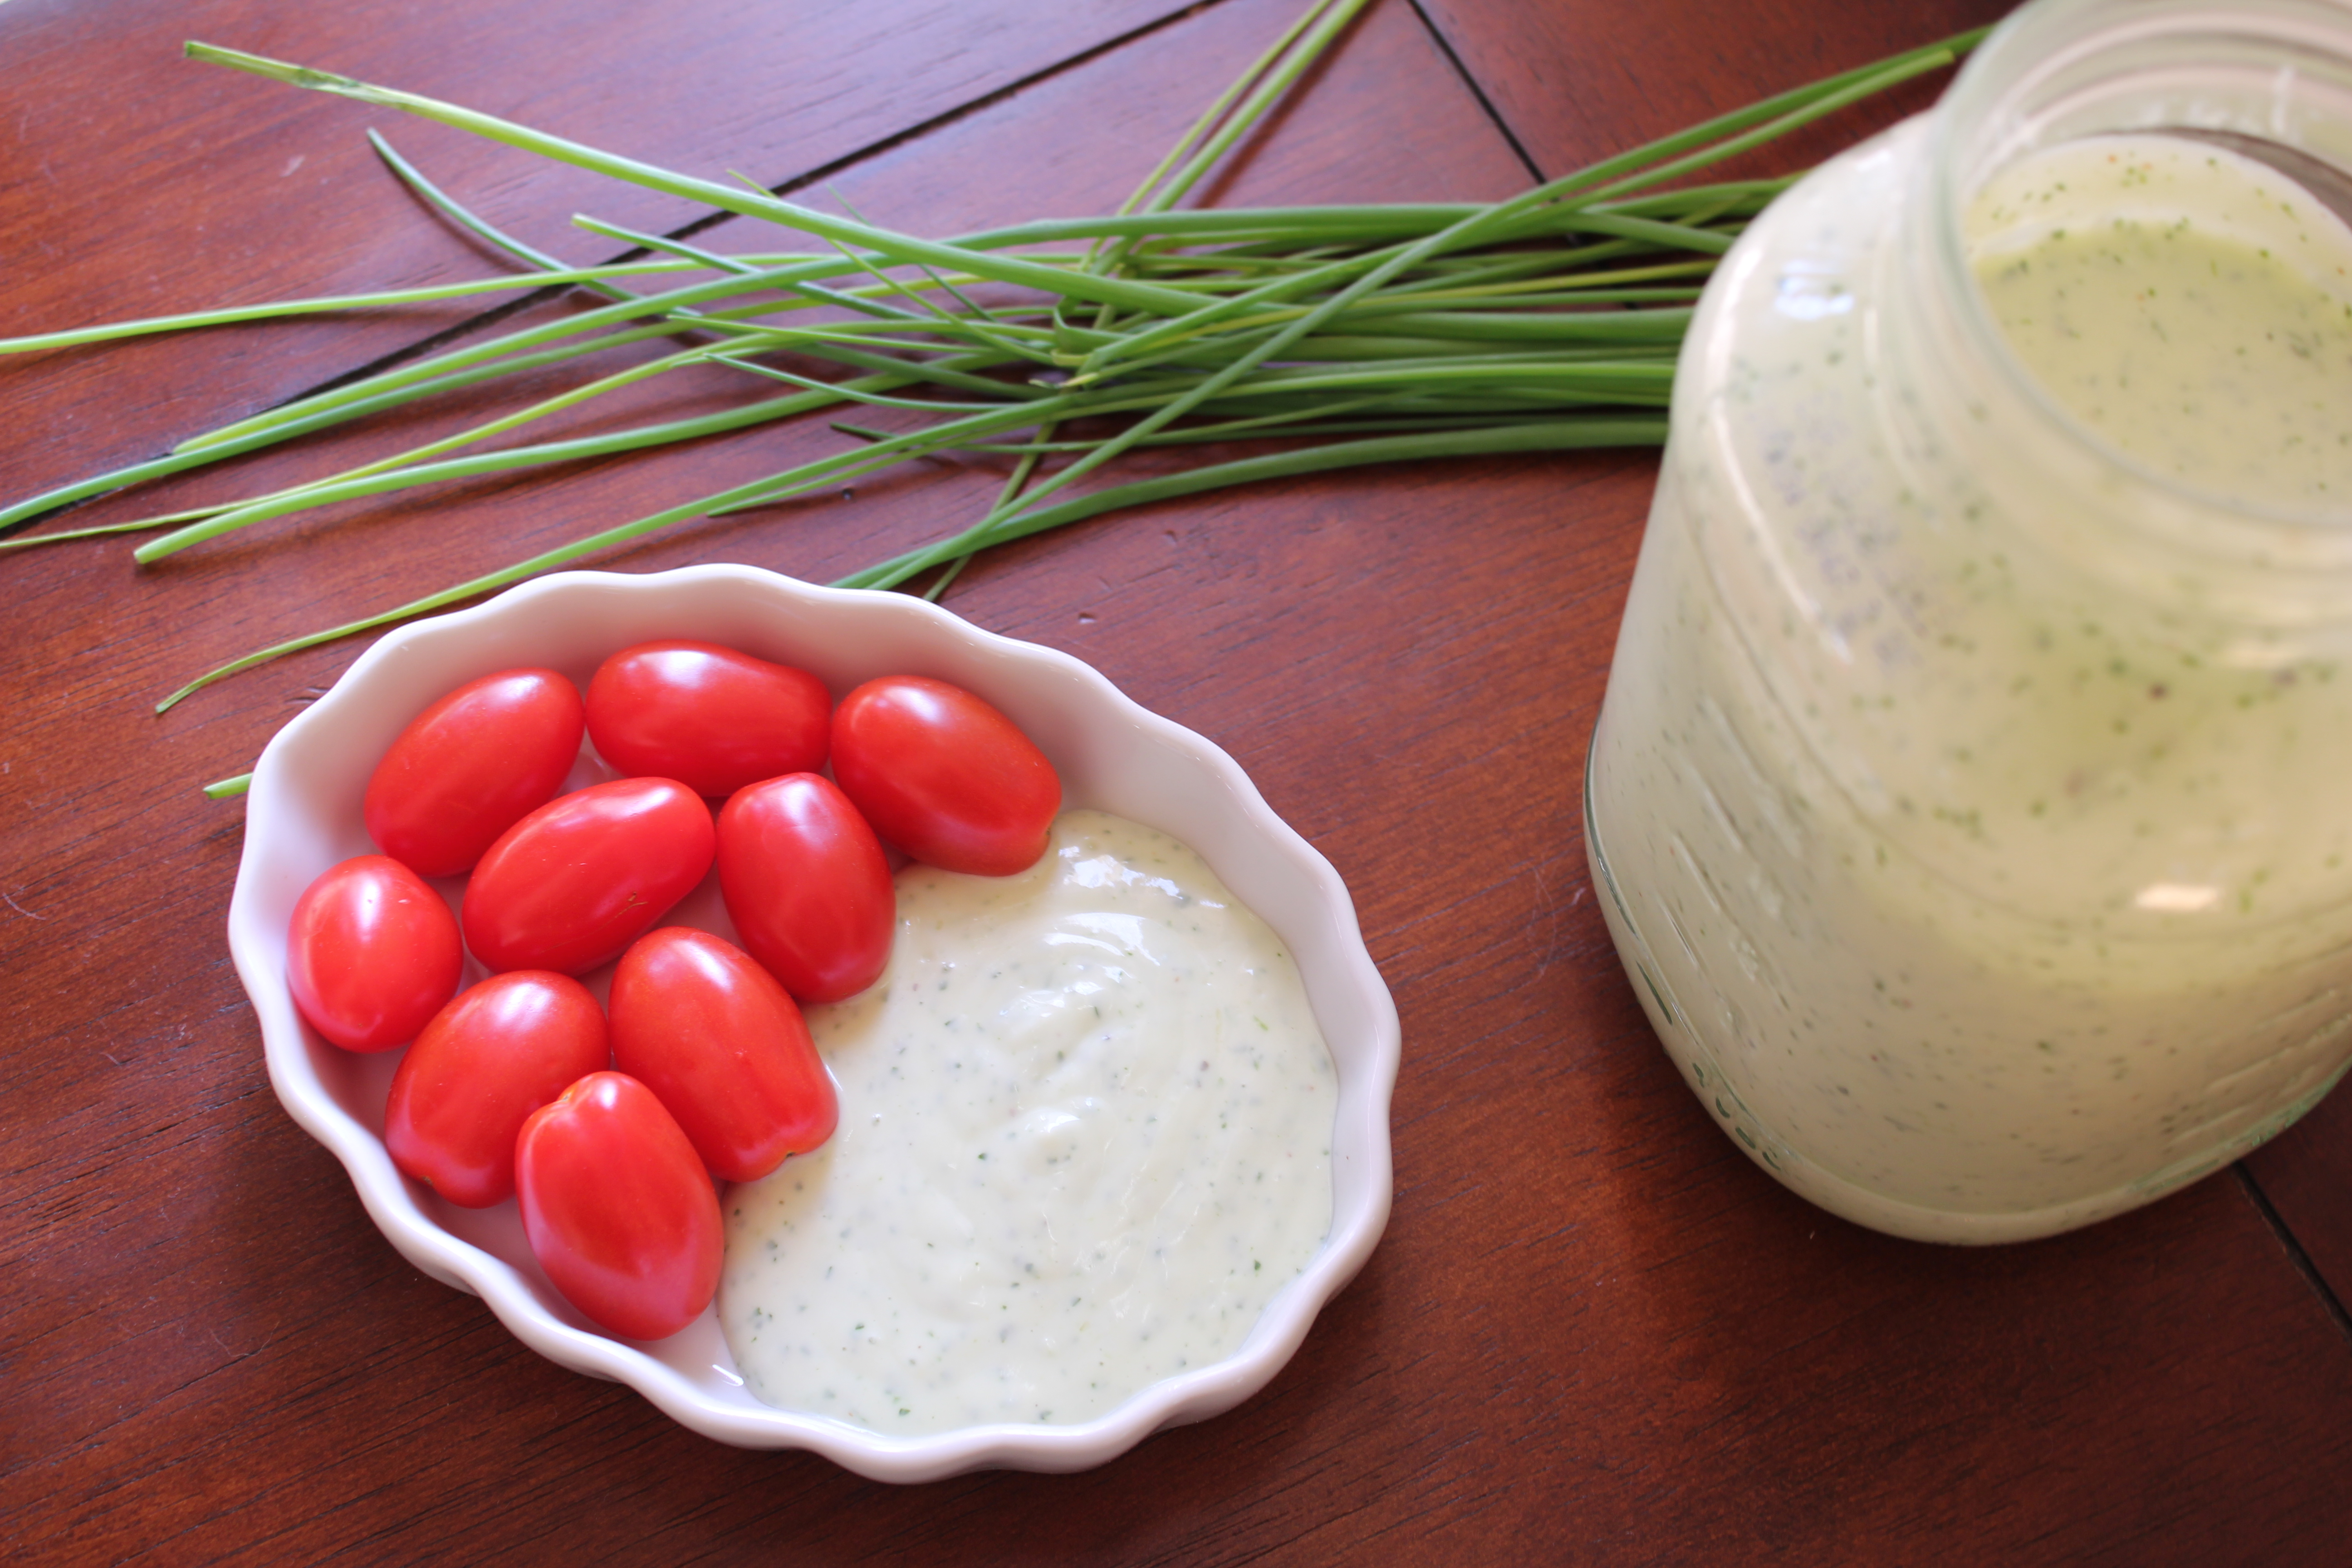
Super Simple Ranch Dressing

Your days of homemade ranch consisting of a packet and a tub of sour cream should be over after you try this. This recipe is creamy and delicious and super simple to make. You can change up the herbs to your liking, even adding some hot sauce if you like it spicy, anything is possible. The first time I made this I didn’t have any Italian parsley so I used Cilantro instead and it was great. So you could do just about any combination you can think of. It is easiest if you have a food processor but if you don’t a blender would work too. Gattor had a lot of fun  making this dressing with me and even more fun eating it.

Ranch Dressing:

adapted from: Annie’s Eats

Ingredients:
¾ cup mayonnaise (light or regular)
¾ cup sour cream (light or regular)
1 tbsp. olive oil
1 tbsp. lemon juice (I used an entire lemon)
¼-1 cup buttermilk (I used the full cup)
1 small bunch chives
Small handful parsley
1 clove garlic, chopped
½ tsp. kosher salt
Freshly ground black pepper

Dash of hot sauce is optional.

Directions:
Combine all of the ingredients in a blender or food processor starting with ¼ cup of the buttermilk and blend for 10 seconds.  Check the consistency and taste and blend in additional buttermilk as desired.  Season to your liking.  Store in an airtight container in the refrigerator.

This dressing can be made with any combination of herbs you like: dill, cilantro, green onion, are just some of your choices. You can also add a bit of hot sauce to if you like things spicy or some blue cheese for a chunky choice. Have fun with it and you will never have to buy store bought ranch again.

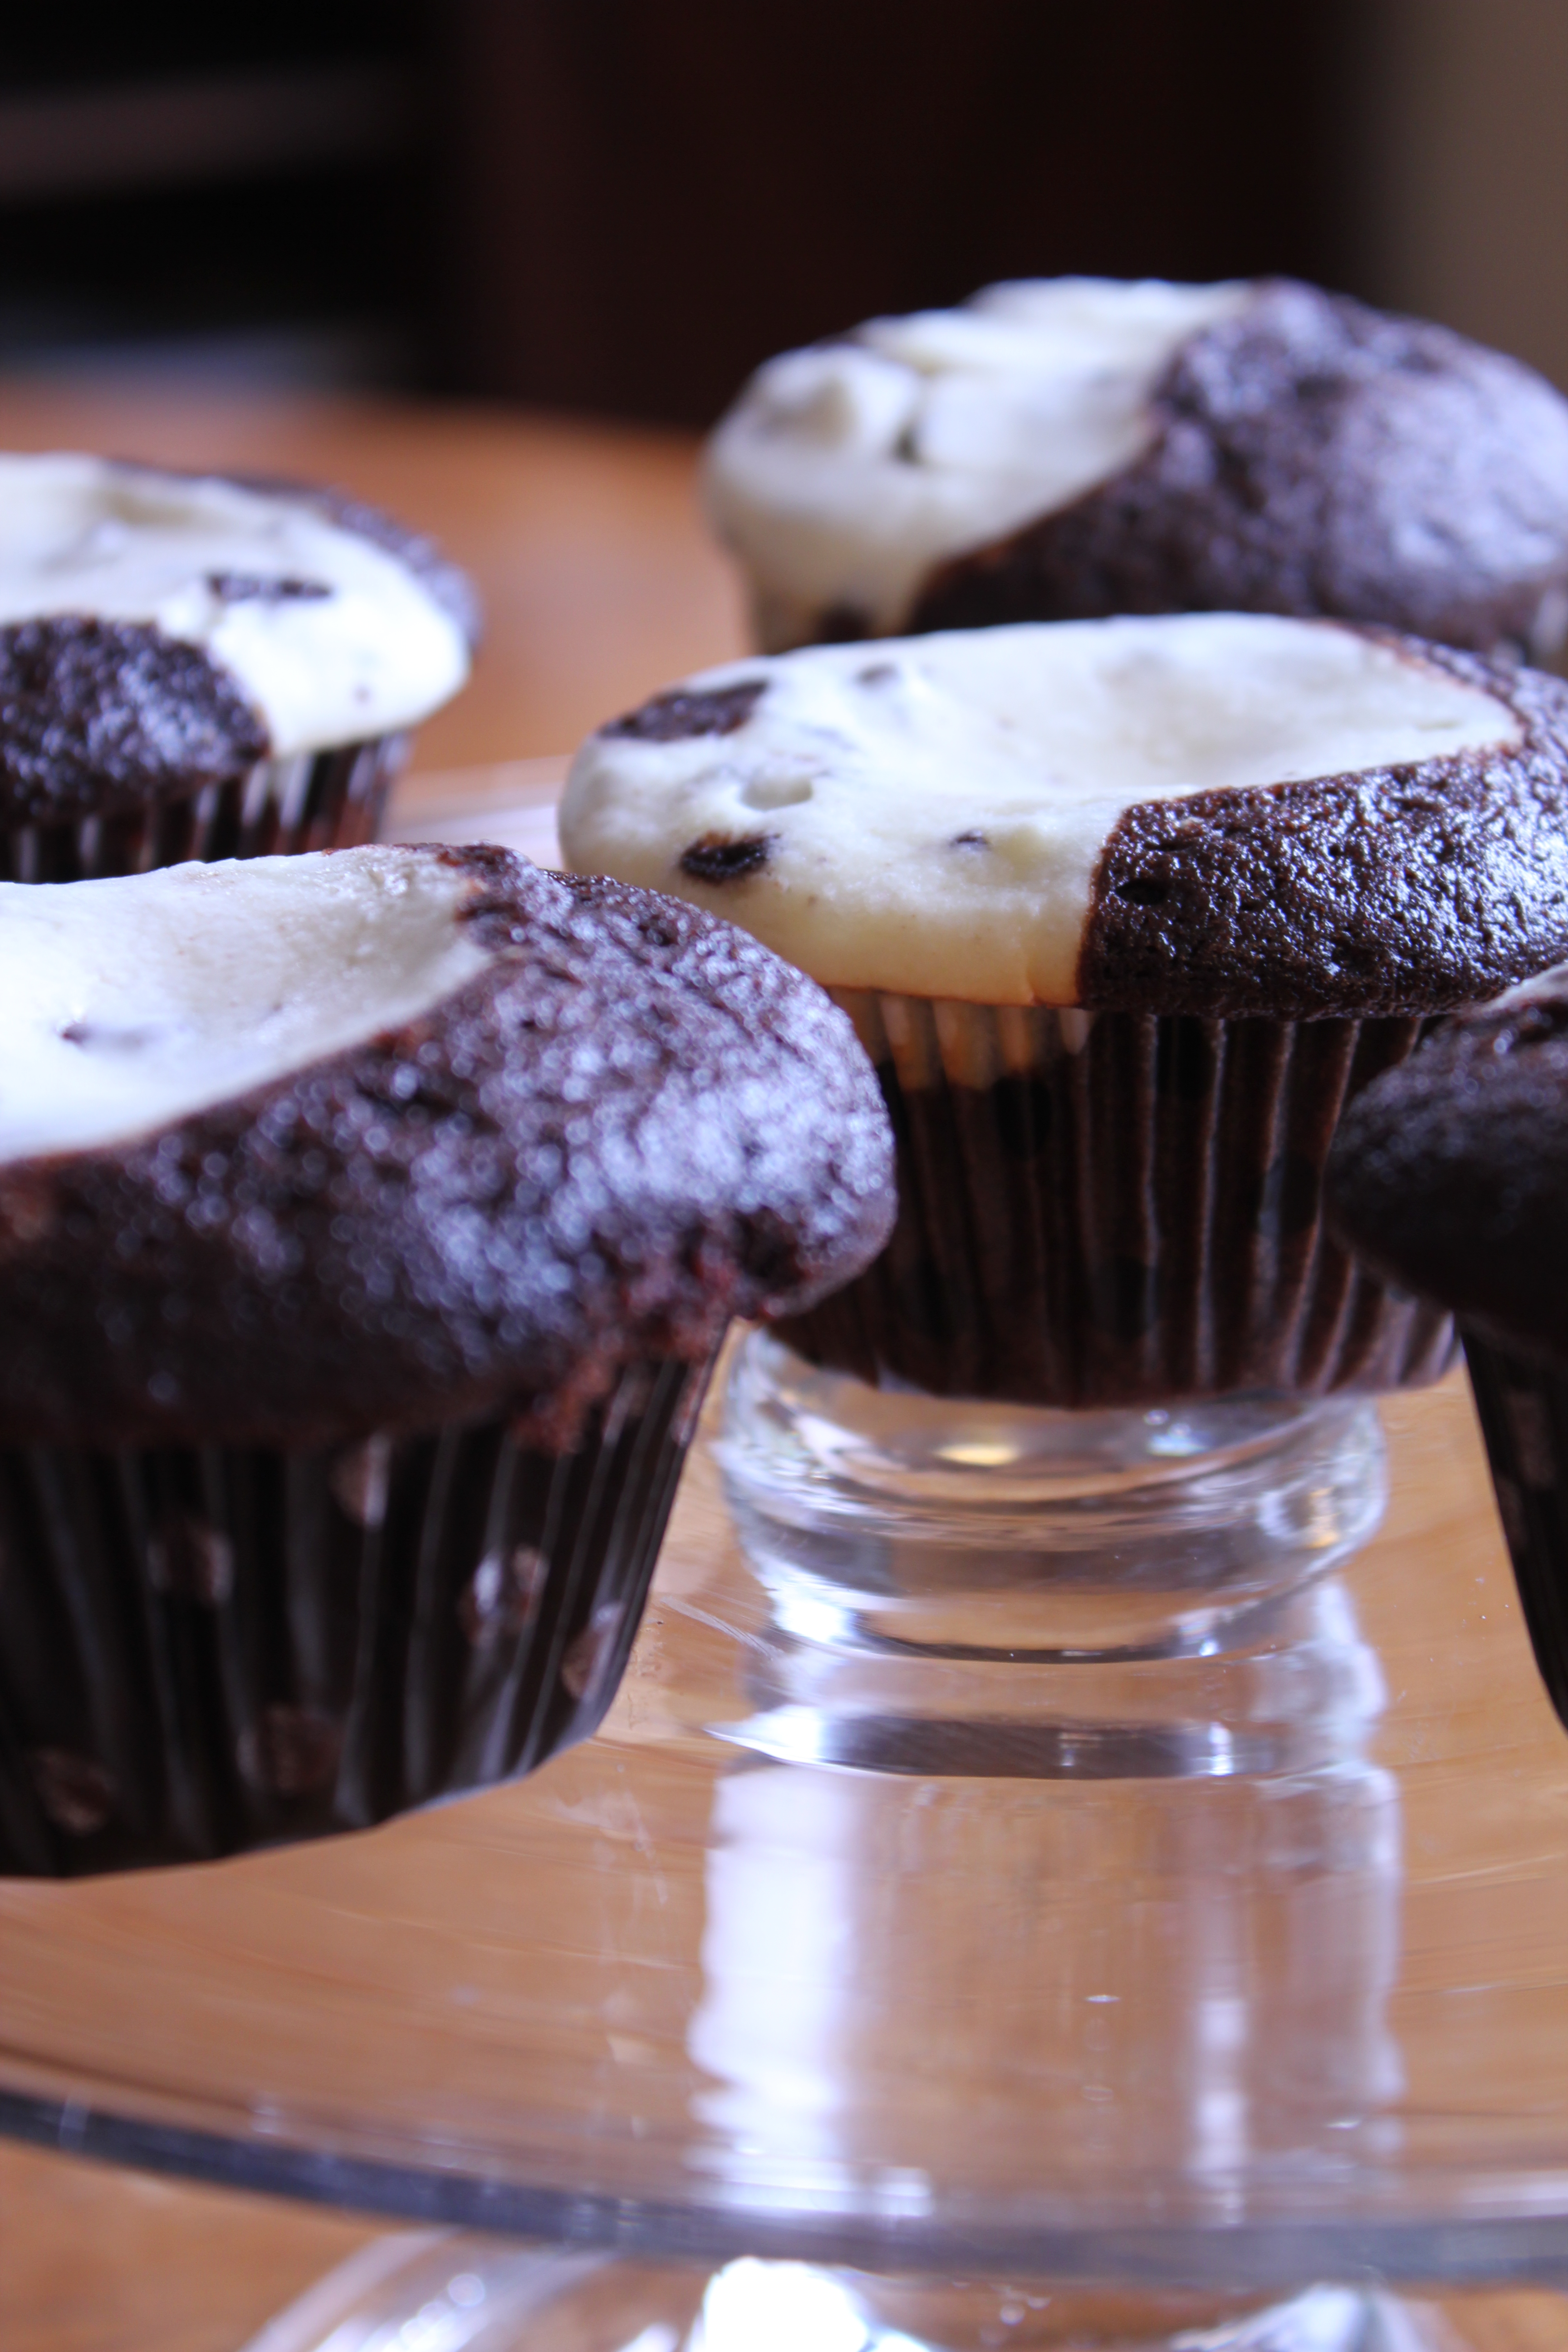
Black-Bottom Cupcakes

When I asked my friend Maria what cupcake she would like for her birthday she requested black bottom cupcakes. I had honestly never heard of them before but I am always game to try something new. These are incredibly easy, in fact you can bang these out in under and hour and with no frosting to complicate things, clean up couldn’t be easier. They taste fabulous, somewhere between a cupcake and a muffin, with the mix of the cake and cream cheese filling keeping everything very moist. If you want a quick fun cupcake try these out, they do not disappoint.

Black-Bottom Cupcakes  (makes about 12-14 cupcakes)

Adapted from: Smitten Kitchen

Recipe:

Filling:

  • 8 ounces cream cheese at room temperature
  • 1/3 cup granulated sugar
  • 1 large egg, at room temperature
  • 2 ounces chopped semisweet chocolate (I used mini chocolate chips)

Cupcakes:

  • 1 1/2 cups all-purpose flour
  • 1 cup firmly packed light brown sugar
  • 5 tablespoon unsweetened cocoa powder (natural)
  • 1 teaspoon baking soda
  • 1/4 teaspoon salt
  • 1 cup water
  • 1/3 cup vegetable oil
  • 1 tablespoon white or cider vinegar (I used cider)
  • 1 teaspoon vanilla extract

To make the filling: Beat the cream cheese, sugar and egg together until smooth. Stir in the chopped chocolate pieces (or mini chocolate chips).

To make the cupcakes: preheat oven to 350′F. Prepare you muffin tin with paper wrappers. In a medium bowl sift together the flour, brown sugar, cocoa powder, baking soda and salt-stir with a whisk. In a separate bowl, mix together the water, oil, vinegar and vanilla.

Make a well in the center of the dry ingredients and stir in the wet ingredients, stirring until just smooth- do not overmix. Divide batter among muffin cups, I filled about 1/2 way. Then add a few tablespoons of the filling to the cupcakes. I did it off to the side for a black and white look but you can just add it to the center. This will fill the cups almost completely, mine went over the edge a bit but not too bad. Bake for 25 minutes, or until the tops are slightly golden brown and feel springy when gently pressed. Let them cool in the pan till they are set, about 20 minutes. Then cool completely on a cooling rack.


Previous Older Entries Next Newer Entries

Follow

Get every new post delivered to your Inbox.

Join 422 other followers